Project Zomboid Mods für Server
Für einen modifizierten Project-Zomboid-Server brauchst du pro Projekt die Steam-Workshop-ID und die interne Mod-ID. Prüfe zusätzlich Spiel-Build, Abhängigkeiten und Lade-Reihenfolge, bevor du deine Welt mit den Änderungen startest.
Project Zomboid Mods sicher installieren
Ein Workshop-Abo allein aktiviert eine Mod auf dem Dedicated Server nicht. Die Einträge in `WorkshopItems=` und `Mods=` müssen zusammenpassen; außerdem muss jede Mod den gewählten Build 41 oder Build 42 ausdrücklich unterstützen.
- 1. Build prüfen: Build-41- und Build-42-Mods nicht ungeprüft mischen.
- 2. Workshop-ID, Mod-ID, Abhängigkeiten und erforderliche Reihenfolge vollständig dokumentieren.
- 3. Welt und Konfiguration sichern, Server neu starten und Logs sowie den Beitritt mit einem Test-Client prüfen.
Die vollständige Schritt-für-Schritt-Anleitung findest du im Project-Zomboid-Mods-Guide. Oder starte direkt mit einem Project Zomboid Server mit Mod-Support.
Häufige Fragen zu Project Zomboid Mods
Was ist der Unterschied zwischen Workshop-ID und Mod-ID?
Die Workshop-ID bezeichnet das Steam-Workshop-Projekt und steuert den Download. Die Mod-ID aktiviert den enthaltenen Mod im Spiel. Auf dem Server müssen beide Listen vollständig und passend gepflegt sein.
Laufen Build-41-Mods automatisch mit Build 42?
Nein. Nutze eine Mod nur dann auf Build 42, wenn ihre Workshop-Seite diese Kompatibilität ausdrücklich bestätigt. Prüfe dabei auch alle Bibliotheken und weiteren Abhängigkeiten.
Wie teste ich ein Mod-Update ohne Risiko für die Welt?
Sichere zuerst Welt, Sandbox-Konfiguration und Server-INI. Aktualisiere danach die zusammengehörigen Mods, starte den Server neu und prüfe Logs, Kernfunktionen und einen vollständigen Client-Beitritt.
![[RU]WellsConstruction – Project Zomboid Mod](https://images.steamusercontent.com/ugc/1793018327246888305/D1764FCF651D8B04988606BF86E2C3965743EBE6/)
[RU]WellsConstruction
von 76561198969969421
Фикс перевода модификации WellsConstruction Workshop ID: 2862817283 Mod ID: WellsConstructionRU
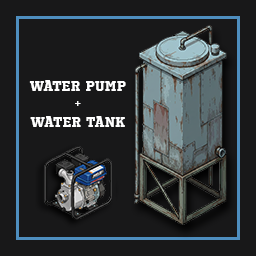
Water Pump
von 76561198066693482
AI USAGE DISCLAIMER This mod was developed entirely with code generated by Claude. There is not a single line written by hand. My work was designing the whole logic of the system, providing the game and modding knowledge, reading the debug output, giving context and steering the development until it did what I wanted. The project was supervised, tested and optimised throughout, including the multiplayer port, always aiming for efficient code with no unnecessary performance cost. The tiles and sound effects are my own work. Water Pump — running water after the end of the world, at last! A fuel-powered motor pump and a 3000 litre tank. You draw water from a river, a well or some barrels, lift it into a tank up high, and from there gravity feeds the taps of the whole house. No electricity needed. It also does something much simpler: moving water from one place to another without hauling cans by hand. Getting water running, step by step - Put the pump down near a water source and connect it to that source (river, well, barrels, another tank) and to an output container. - Fuel it and turn it on. Water starts moving on its own. - Build the tank up high — your roof is the natural spot — and connect it from its menu. - Install a water connection on each fixture with a pipe wrench. - Plumb the fixture with the game's own "connect to water source" option. This step is not optional: until you do it, the tap keeps serving its own leftover water and ignores your tank. How to tell it worked: a tap running off your tank reads 40/40. If it still reads 20/20, that is the tap's own leftover water and it is not on the tank yet. And if the tank is empty, a plumbed tap has nothing to give and shows no water options at all — exactly like an empty rain barrel. The pump Heavy: it takes both hands to carry. Place it from the menu to pick the facing, or just drop it on the floor and install it later. - Fuel: 20 litres, filled from cans or bottles. It burns about half a litre per hour while running, whether it is pumping or not. - Flow: 5 litres per in-game minute. - Range: draws from 3 tiles away on its own level, pushes up to 20 tiles away and 4 floors higher. - Condition: wears down with use, repaired with a pipe wrench and scrap. Do not run it dry. Left on with no water at the intake, the engine overheats in a couple of in-game hours. Below 20% condition it can burn out for good: it will not start and cannot be repaired. It only moves water. Petrol, bleach or anything else is refused, and if you force it the engine coughs, will not start and loses 15% condition. Rainwater is fine, but the pump does not purify — lift rainwater and rainwater is what you get up there. The info window shows status, fuel, condition and connection count, and while it is open it highlights the connections in the world: green for outputs, blue for sources, red for a contaminated one. The fast way to read a big setup. The tank Built from the construction menu with Welding 4 and the recipe learned. It holds 3000 litres and takes sheet metal, scrap and pipes. It starts disconnected, so you can fill it before it begins distributing. Once connected it feeds by gravity, with no fuel and no electricity: 20 tiles around, and downwards with practically no floor limit — a rooftop tank can supply a whole building or a bunker. Lifting water up is the pump's job, and that does have a limit of 4 floors. The water connections With a pipe wrench and a tank in range you can install a connection on any tap, toilet, shower, bathtub or washing machine. It is invisible: it does not clutter the house and you can keep building over it. It behaves like a rain collector sitting above the fixture — except one tank supplies every fixture at once. It has to be an enclosed space. The game's plumbing only works inside a space closed off by walls, a map house or one you built yourself. A roof alone is not enough: a covered patio will not do. That is the game, not the mod, so the menu tells you the reason instead of letting you waste the wrench. One connection covers a 3x3 area, so a sink and a toilet next to each other share one. If a spot is already covered the mod says so — including when what covers it is your own rain barrel, in which case you do not need the mod there at all. You can remove a connection from the same menu. While one is installed you cannot pick the fixture up, and if the fixture is destroyed the connection goes with it. Going further: cascading A tank can be the output of one pump and the source of another at the same time. Chaining pump → tank → pump → tank lifts water as high as you want: tested in the tallest buildings. Barrels work too. Every stage costs fuel, so it is a real decision. The highest tank fills first, then the ones below. With several pumps around, the menu lets you pick which one each thing connects to, showing position and status, so you never have to guess. How to get it - The pump shows up mostly in hardware stores, and at a lower rate in garages and industrial warehouses — roughly where you would find a generator. Sometimes it is lying on the floor of a garage. - The magazine "Off-Grid Water Systems" teaches both the tank and the pump. Hardware and electronics stores, and with less luck libraries, bookshops, magazine racks and house shelves. - Operating the pump is also learned on its own at Electrical 3 — but for the tank you do have to find the magazine. Multiplayer It works in multiplayer. Ported and tested against a real dedicated server: placing, installing, turning on, fuelling, connecting, the tank, the connections and the water transfer are all synced. If you hit a bug, leave it in the comments. Removing the mod from a save Straight answer: on a world where the water tank was built, you cannot fully remove the mod. Zomboid registers the tank's script in that save's WorldDictionary, and after that the client refuses to load the world without it — Missing dictionary script: WaterPump.WaterTank. I tested it: with the mod on both sides it loads; missing on the server, or on both, it fails. That is a Zomboid limitation, not a choice of the mod, and no mod can reach it. Nothing is lost, though. Put the mod back and the world opens again; Zomboid reinstates the entry by itself. So if what you want is a world with none of the mod's stuff in it, run the cleanup and just keep the mod in your load order — once the cleanup has run it does nothing at all. In the Lua console with debug mode on: - Single player: WPM.desinstalar() - Multiplayer, as admin: WP.pedir(getPlayer(), "desinstalar", {}) It wipes every pump, tank, connection and mod item from the loaded area, and lists whatever sits in an unloaded chunk with its coordinates. In multiplayer the report prints to the server log. If you truly need it gone, back up the save and look up Project Zomboid WorldDictionary missing dictionary script. Never just delete that .bin file: it scrambles the save's IDs. Tested on Build 42.20 (stable branch), single player and multiplayer with a dedicated server. Available in Spanish and English. Workshop ID: 3772302032 Mod ID: WaterPump
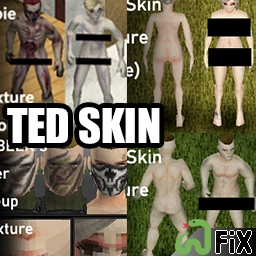
TEDSKIN FIX B42
von 76561198055342556
Requested updated version of https://steamcommunity.com/sharedfiles/filedetails/?id=2784099930 for B42 Will clip with some modded facial hair but that's just the mod itself, can't do much without resclupting it from scratch Might be incompatible with Spongie's Character editor, or rather it shouldn't be modifiable with it, I didn't test it but just a disclaimer Credits to Fluffy &TED etc, you know the drill Workshop ID: 3496413057 Mod ID: TEDSKINFIX
More Traits Balance
von 76561198329871201
Choose the cost of more traits. Ask for permission This mod can only be added to and extended with the express permission from the original creators. Having received permission, credit must be given to the original creators, both within the files of the mod and wherever the mod roams online. If no permission is received you may not alter the mod. You wanna support? A nice word is always welcome. Constructive feedback too. Else you can: . Workshop ID: 3016595200 Mod ID: MoreTraitsBalance

Girls und die Toten
von 76561198118067167
Current Mod Version: 3.0 Supported Game Versions: - Stable Build 42.20 - ✓ - Legacy Build 41.78.19 - ✓ "Panzer Vor!" Express your Sensha-dō spirit in battle with the wearable cosplays of your favorite Sensha-dō competitors from Girls und Panzer! Important notes: - In B41 the traits cost 1 trait point, while in B42 they cost 2. - Additionally in B42, school traits also grant various skill points and XP boosts. - Girls und die Toten Moodles must be enabled through Moodles in lua! (Recommended moodle size is at least 48x48) - Steps on how to install the animated menu: 1. Open the mod files at → steamapps\workshop\content\108600\3673396516 2. Copy over the .bik file from → GirlsunddieToten\42\media\videos To → steamapps\common\ProjectZomboid\media\videos\ backup of the original .bik recommended! (The game only loads videos from its own media\videos folder.) Recommended mods: - Better Dressed - Transmog or Transmog: Definitive Edition - Fashionoid 2 (Use them to hide other equipment in case of model clipping and rendering issues. One for Build 42, and the other for 41 respectively) - Anime Shader Supported Languages: - The default language is English (by Ryo) - Obsługuje język polski (by Ryo) - 日本語対応可能 (by Ryo) - Tukee suomen kieltä (by Ryo) - Поддерживает русский язык (by ๖ۣۜDomitori™) - 支持简体中文 (by Patzzzz) - 支援繁體中文 (by Patzzzz) If you would like to contribute to this mod by adding a translation to your language (including the Workshop page), please let us know in the comments or discussions! Credits: Girls und Panzer (ガールズ&パンツァー) © Actas Inc. FULL CREDITS FOR MODELS USED IN THIS MOD Ask for permission This mod can only be added to and extended with the express permission from the original creator. Having received permission, credit must be given to the original creator, both within the files of the mod and wherever the mod roams online. If no permission is received you may not alter the mod, and it must be treated as a mod that is 'On Lockdown'. You are not allowed to repack this mod under any circumstances, ever. © 2026 Peak Development Department, Ryo & Domitori Workshop ID: 3673396516 Mod ID: RyosGuP Mod ID: RyosGuPLib Mod ID: RyosGuPMLLSDIcons
![Ellie's Tattoo Recipes [JMC] – Project Zomboid Mod](https://images.steamusercontent.com/ugc/2006966840101704247/A3CE9329B7E153DCD6D08973C09F595623F2D11E/)
Ellie's Tattoo Recipes [JMC]
von 76561198106690944
NOTE: This is the very first (actual) contribution I've done to the Steam workshop, feedback will be appreciated! Do you feel like your characters lack customization? Do you wish to give them tattoos? Oh what's that, you found Ellie's Tattoo Parlor mod and you want to use it? Great! Just subscribe to it and go straight into your world- oh, wait, the new items won't spawn on already discovered areas... Well, if that's the case, you went through the same experience as I did, and so I bring you: Recipes for Ellie's Tattoo Parlor! This mod offers easy-to-accomplish recipes to create the items needed for Ellie's Tattoo Parlor mod. It's mainly intended to be used in already created (and mostly explored) worlds, or servers without item respawn enabled. Even so, if you just wish to have a way to replenish your supply of tattoo-crafting materials without needing (that much) luck, this is your mod! Recipes There's a total of 8 different recipes: Empty Tattoo Needle recipe 1 - One Suture Needle OR one Needle Empty Tattoo Needle recipe 2 - Six Scrap Metal Small Paint Brush recipe 1 - One Toothbrush Small Paint Brush recipe 2 - One Sturdy Stick - Three units of Twine Tattoos Ink Box recipe 1 - One Lunchbox OR Toolbox OR Tarp - One unit of any Hair Dye Tattoos Ink Box recipe 2 - One Small Metal Sheet - One unit of any Hair Dye Tattoos Ink Box recipe 3 - Six Aluminum - One unit of any Hair Dye Lactic Acid - One Empty Bottle (any vanilla kind) - Two units of Gasoline Important Remember that you NEED Ellie's Tattoo Parlor Mod in order for this mod to work, and while you're at it, consider giving them a thumbs up for the mod! Ellie's Tattoo Recipes doesn't include any piece of code from the original mod other than Item IDs, it's merely an addition and requires the main mod in order to function. Also, go ahead and check out My Workshop for more mods! Have fun making art on your character/s! Workshop ID: 3004465433 Mod ID: ElliesTattooRecipesJMC

Jordan's Extra Stuff 2.0!
von 76561198119546305
THIS MOD IS MADE FOR WASTELANDRP AND WILL NOT ENTIRELY WORK WITHOUT USING THEIR MOD PACK ALSO ISNT COMPLETED: SOME THINGS ARE TO BE CHANGED AND ADJUSTED, LIKE TEXTURES, CODE, ETC. Extra clothing, items, recipes, melee weapons etc. - Library of models by Kattaj used in the dependency. - Scrap bomb model by Realnik. - Textures/Icons by Galo - Some Textures/Icons by Xaphane Description is going to edited/updated properly soon. This is a test run to find issues. MOD UPDATED: 22/5/25 Removed old season content from wasteland. Workshop ID: 3300434185 Mod ID: JordansExtraStuff 2.0
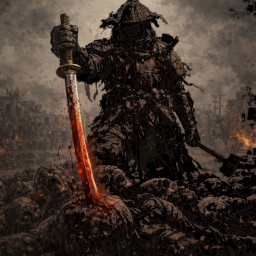
KatanaZ: Primitive Rooted Survival
von 76561198053734238
-------------------------------------------- B42 -------------------------------------------- -------------------------------------STAGE FULL REWORK----------------------------------- -------------------------------------------- B42 -------------------------------------------- TESTED WORKING IN 42.20! Adds down-to-earth blacksmithing path to craft vanilla katana-style weapons and tools with varying degrees of condition and sharpness. While also being able to do almost every task in the woods off of only what is provided by your skills, efforts, and of course a little luck never hurts. Includes step-by-step methods to smith, hone, and assemble makeshift weapons and tools, making full use of the new vanilla crafting systems - from Blacksmithing to Assembly. Includes skill magazines to learn the crafts. This mod favors time, practice, and material investment over randomness or shortcuts. Early progress is slow by design. Expect long periods of subsistence before advancement. Designed for Build 42 vanilla crafting systems. Crafted katanas are powerful, but quality is never guaranteed - mastery comes from repetition, not RNG. xxxxxxxxxxx EARLY SURVIVAL xxxxxxxxxxxx Fire, clean water, tools, and food all have emergency methods - but none are meant to be comfortable or efficient. Every system has a desperate fallback. None are meant to replace proper tools. Build primitive forges and furnaces in almost any walk of life. Fish with only what nature provides, make a hook out of hardwood or even twine when there is nothing else. (These variants will be much worse at catching anything than an actual hook.) Cook primitive soup or tea in salvaged empty tin cans. Scrape wood to gain understanding and/or healing bark shavings. Build stone wheels or blocks out of hard pressed clay blocks. Filter water using a cut bottle and precious time and resources. Progress is often logistical, not technological - carrying, storing, and preparing materials is advancement. + STAGE 1 - LEARNING THE TAO Begin by devoting your life to all types of metal and many new disciplines. Find the magazines and study the crafts. Or put in the work and learn how to make each tool and weapon strike by strike. Focus on practicing Blacksmithing - we all start somewhere. Pour metal, sweat and knowledge. Build your skills in Blacksmithing, Pottery, Masonry, Fishing and Foraging. Be rewarded for practice and patience, hone skills across the entire experience. At Blacksmithing Level 2, the journey truly begins. Routine, patience, and preparation are progression. + STAGE 2 - DEVOTION & DEDICATION TO THE TAO Practice mixing coal and precious metal scraps to create Flux Powder. After crafting many different metal tools and components, you begin to understand the elements within scrap more clearly. Separate scrap to extract Carbon Chunks. With time and dedication, you will become capable of drawing out the carbon needed to begin true blade smithing. During your training and development of your crafts, you can also hammer out crude weapons and tools, and even with enough uninterrupted time and dedication you could forge almost anything. Explore different metals and make new things out of old ones. + STAGE 3 - BECOMING ONE WITH THE TAO This stage will take a long time. During this time you can pour metal into various ingots, and even combine others to make alloys. ==================================== You will craft many blades. You will also craft many tools Most will be dull. Some will be fragile. Few will meet true standards. Everything will eventually break. ==================================== But as you practice and refine your craft, you will grow with the steel and curve with the edge. Become more capable and able to make something from nothing. And one fateful day, you among the far and rugged few may finally say: "I have crafted a True Warrior's Katana." "Great works are performed not by strength, but by perseverance." - Samuel Johnson "The two most powerful warriors are patience and time," - Leo Tolstoy --------------------------------------------------------------- Become an Ancient Swordsmith. Walk the Way. --------------------------------------------------------------- (Tested in a live multiplayer environment with 100+ mods!) (Designed to coexist with large mod lists and multiplayer pacing!) --------------------- COMPATIBILITY --------------------------- It seems most things in B42.13 do not respond well to anything that changes + IStimedaction Otherwise should be compatible with everything unless it touches the same files. MY MOD CHANGES + entity_hand_press (Edits TIS Build Recipe) + entity_kiln_large (Edits TIS Build Recipe) + fishing_properties.lua (Makes my fish hooks valid and adds new trash loot and other goodies?) ===================================== RECOMMENDED ===================================== I highly recommend this mod at least for crafting to make sense. (IntuitiveCrafting) As well as this to make crafting less menu heavy. (SmartRadialMenu) THESE TWO MAKE CRAFTING SIMPLE AND FUN!! Also to be able to gather water in the wild we would build a well. (GRM-MyOwnWell) (GRM-MyOwnWell-Primitive) This one will add more forageables, and the ability to make primitive medicines. (herbalist) Before you say "These timings are really long" understand the scope of this is for a concept. Anyone, at any skill level, can do almost anything with enough time and energy. Meaning that it is meant to be long, difficult, and painful. However it is also rewarding, your efforts will bear fruit of many kinds all you have to do is sow the seeds. Known Issues.... B42 is buggy. That being said I personally am and have exclusively tested ALMOST every single line of code I have added or tweaked. Spent countless hours with a line in the water to check the fishing functions and easily over 100+ hours for all other functions and progression paths. I spent some time trying to understand TIS animations for recipes, but anything that needs a craft GUI (Ie: Sharpening Stone, Forges, Kilns, Furnaces) if you close the craft menu the recipe halts. Fishing rods are weird, they work but they are odd. NOTES ON FISHING RODS FOR B42.13+ MOST IMPORTANT CAST LINES ONLY USING PRIMARY AIM FUNCTION (MOUSE BUTTON) DO NOT USE AIM KEY YOU WILL NOT PULL CATCHES IF CHARACTER IS AIMING EVER 1. The created rod will always be a random hook and line set, this is just how it works as of now. That can mean you make a crappy rod and get rng a forged hook and premium line. It happens. 2. Fishing rods do not break. At least the crafted one it seems bugged in my server with no mods even. 3. Sometimes the rod will appear in your hands upon reload and you will not be able to do anything timed action related. Unequip and re-equip the rod or place it on the floor. 4. If you seem to be waiting for a while just recast. If that does not work, rebait or remove the bait and recast. Reloading often fixes it. Otherwise please let me know if you notice anything else. I can fix most issues if they break the mod or game. This mod's permissions fall under TIS's policy Ask for permission This mod can only be added to and extended with the express permission from the original creator. Having received permission, credit must be given to the original creator, both within the files of the mod and wherever the mod roams online. If no permission is received you may not alter the mod, and it must be treated as a mod that is 'On Lockdown'. The only exception is that servers may freely include this mod in their modpacks, with the freedom to alter it or make modifications as they see fit, as long as credits are properly given to the original creator. Workshop ID: 3646824783 Mod ID: KatanaZ
Custom Start
von 76561197995968948
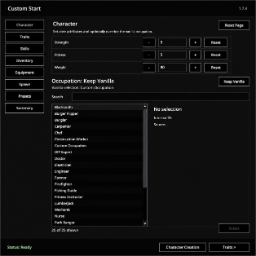
Custom Start Complete control over your start. Custom Start extends Project Zomboid's vanilla character creation with a dedicated fullscreen setup menu, allowing you to configure nearly every aspect of your survivor before entering the world. Instead of replacing the game's existing character creation, Custom Start adds a new Custom Start button alongside the normal Play button. Use the expanded setup menu or continue using vanilla character creation exactly as before. The dedicated setup menu guides you through your survivor's configuration with a page-based interface while keeping every stage accessible at any time. Features - Extended character setup - Occupation and trait selection - Skill customization - Starting inventory configuration - Equipment and backpack management - Interactive map-based spawn selection - Optional zombie clearing around custom spawn locations - Reusable presets - Complete setup summary before entering the world Dedicated Interface Custom Start uses its own interface designed specifically for survivor setup. The vanilla Sandbox, World, and Character Creation menus remain untouched. Inventory & Equipment Choose exactly what your survivor begins with. Configure: - Starting inventory - Item quantities - Worn backpack - Backpack contents - Primary hand equipment - Secondary hand equipment The Equipment page works together with the Inventory page to make organizing your starting gear quick and intuitive. Spawn Selection Select your starting location directly from an interactive world map. Presets Save complete survivor configurations for future games. Presets store your entire setup, including: - Character - Occupation - Traits - Skills - Inventory - Equipment - Spawn settings Load a saved preset at any time or use it when creating a replacement survivor after death. Summary Before entering the world, review every part of your survivor's setup on a single page. Compatibility Custom Start is designed to work alongside Project Zomboid's existing character creation without replacing it. The normal Play button remains available, allowing players to use either the vanilla setup or the expanded Custom Start workflow. The mod also dynamically detects compatible content added through Project Zomboid's standard systems, allowing traits, occupations, items, and other supported content from compatible mods to appear automatically. Frequently Asked Questions Does this replace vanilla character creation? No. Custom Start adds a new Custom Start button beside the normal Play button. Vanilla character creation remains fully available. Can I still start a normal game? Yes. Simply press the standard Play button. Can I use this for replacement survivors after death? Yes. Custom Start is available both when creating a new game and when creating a replacement survivor. Are presets saved? Yes. Presets are stored and remain available between game sessions. Does this work with other mods? Custom Start is designed to detect and use compatible content added through Project Zomboid's standard systems. Compatible occupations, traits, items, and other supported content will automatically become available within the Custom Start interface.
![Fallout Armory [B42] – Project Zomboid Mod](https://images.steamusercontent.com/ugc/13253013533213398272/34CEDF0E775DC85F3ED52F77B14B6364B3B28F74/)
Fallout Armory [B42]
von 76561198387867714
I repaired, enhanced skins and addapt this mod to build 42 This mod adds in Power Armor and their variants from the Fallout game series and universe. Anyone is capable of putting on and wearing the armor without training, but you're pretty much just wearing a oversize metal suit that limits your characters agility skills. Ones with actual training find themselves with enhanced and abnormal strength with no drawbacks to their agility, so much so that they are capable to charging a zombie/ghoul down to the ground without being stopped while sprinting, but one still need to be watchful of their endurance when dealing with large hordes to not leave themselves stuck in the middle. They are also able to take advantage of the suits slow temperature mitigator. Item featured: -T-51 Power Armor -T-51 Power Armor Helmet -MK II Power Armor -Mk II Power Armor Helmet -Power Armor Training Manual All items can only be found in military locations with rare spawn rates Thank you to Mereel for the original mod, and in words of the modder to Obsidian Entertainment and Bethesda Softworks, now all under Microsoft, for creation and use of IP and work. Thank you to darlak97, creator of The Doom Slayer mod, for Models creation and ideas formation. Thank you to ricochete, creator of the Exo-Suit Mod and all the hands behind the More Traits mod for the LUA coding. Thanks to conny_bengtsson also for base models ports, And a big thank you to the amazing modding environment that the people of PZ and their community to allow me to get something like this done. Loving it! original mod: https://steamcommunity.com/sharedfiles/filedetails/?id=2824161886 Mod part of Project Fallout Workshop ID: 3754116042 Mod ID: PASA
![Keep Tire Pressure [Legacy] – Project Zomboid Mod](https://images.steamusercontent.com/ugc/18682744014752211/63A18AF530BD052B1DF7CA060CBEC7620CE01676/)
Keep Tire Pressure [Legacy]
von 76561197997354095
August 4, 2025 - This mod is no longer required as of Build 42.11. From the patch notes: Fixed tire pressure being set to 0 when uninstalled. Uninstalling a tire will no longer set the tire pressure to 0. The game creates an item of the vehicle part when uninstalled so that it goes into your inventory/ground. When a tire item is created it attempts to set the tire pressure from the vehicle part but does so after the vehicle part is "cleared", causing it to always be set to 0. This mod keeps a copy of the tire pressure value before uninstalling and sets it to the tire item. Workshop ID: 3446703159 Mod ID: KeepTirePressure

True Actions - Dancing Loot Tweak
von 76561197967578704
Rareify the dancing magazine & Kosmo cereal loot from True Actions. Act 3 - Dancing, following the lead of TLLootTweaks by -TL- (Tommy). See also: TLLootTweaks Modified drop rate is 1/5th the original. Workshop ID: 2872752944 Mod ID: TAD-LootTweak
![Ladders! [B42] - Русификация – Project Zomboid Mod](https://images.steamusercontent.com/ugc/13856590942810403850/D602110EE46B7FE04D938ADDB3E5A4E530147B23/)
Ladders! [B42] - Русификация
von 76561198414246143
Русификация Ladders! Да! Вы когда-нибудь хотели забраться по лестнице, чтобы спастись от орды? Мечтали создавать собственные лестницы? Тогда этот мод для вас! Что делает мод? • Лазание по лестницам: Используйте лестницы для быстрого перемещения между этажами • Пожарные шесты: Быстрый спуск по пожарным шестам • Создание лестниц: Крафт деревянных и металлических лестниц • Тактические возможности: Создавайте пути отступления и обходные маршруты Ключевые особенности: Тактические возможности перемещения, система крафта лестниц, реалистичное использование строительных конструкций. Dear foreign friends, this mod is only a localization of the main mod. If you came here because of the preview or text on it, you can safely go to the modification page itself. Хочу перевод Поддержать переводчика Workshop ID: 3592810485 Mod ID: LADDERRUS
Nissan Skyline GTR Skins Expanded
von 76561199088286216
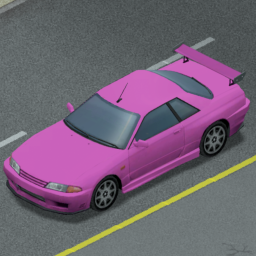
Want more color variety for the Nissan Skyline? This mod has you covered. Doesnt interfere with any other re-script mods! More skins than pictured. Workshop ID: 3319643875 Mod ID: GTRSkins Do not alter the mod, and treat it as a mod that is 'On Lockdown'. You are not allowed to repack this mod under any circumstances, ever.
Zre ApoArmorLeather
von 76561198215872069
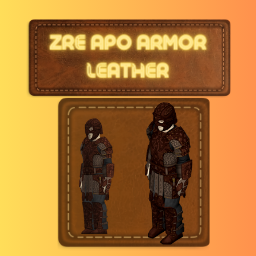
Craftea esta Maravillosa Armadura de Cuero !zRe Apo Armor Leather! Workshop ID: 3228598716 Mod ID: zReApoArmorLeather
Wasteland Modpack
von 76561199485632946
Modpack for the Wasteland RP server https://discord.gg/wastelandrp to join
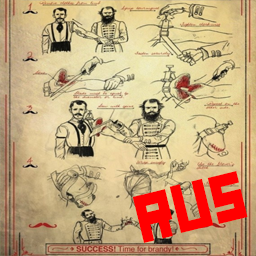
The only cure BETA - UI update RUS
von 76561198261812726
Укусил зомби? Не паникуй ! По крайней мере, если это на уровне рук. Я представляю вам единственное лекарство. Пила. Если вы приложите пилу к зараженному участку до того, как инфекция распространится слишком далеко в вашем теле. Инфекция уйдет, и вы сможете вернуться к нормальной жизни! С другой стороны, во время применения средства вы рискуете очень громко закричать. Вот почему я рекомендую иметь при себе коробку обезболивающих в это время. Я также рекомендую иметь повязку, лучше со спиртом, чтобы сократить время заживления. После того, как пила будет применена, у вас останется рана, которую нужно залечить. Для этого вы можете подождать, но это займет много времени. Вы также можете оперировать с набором хирурга, чтобы ускорить процесс. Есть три комплекта для крафта, некоторые лучше других. Вы также можете исцелиться мгновенно, используя духовку, но это оставит след. Теперь с отрубленной рукой все будет происходить долго и некоторые действия (вроде удержания оружия в руке) больше не доступны. Но тогда как поступить? Еще раз, не паникуйте. Я также предлагаю протезы для замены вашей отрубленной конечности! (Недоступно для полностью разрезанных рук). Есть 3 модели протезов, деревянный крюк, металлический крюк и металлическая рука. Оснащен улучшенным протезом, чтобы сократить время, затрачиваемое на действия. Вы должны быть полностью излечены, чтобы экипировать его. Функции -Пользовательский интерфейс -Управляйте и режьте других в мп -6 рецептов и 6 журналов. 3 комплекта хирурга и 3 протеза. - Хирург по профессии, начни с 6 рецептов, знает и лучше режь и оперируй. -Добавить черту нечувствительности к боли, уменьшить боль на 50%. - После укуса у вас есть около 12 часов, чтобы порезаться, иначе он распространится. (зависит от уровня заражения) - Используйте пилу, садовую пилу или бензопилу, чтобы порезать руку в трех местах. - Во время пореза носите с собой спиртовую повязку и коробку обезболивающего, чтобы не кричать и сократить время заживления. -Скорость любых действий теперь будет увеличиваться и вы не сможете экипировать в обрезанную руку. -После разреза часть нуждается в заживлении. Это занимает много времени. Чтобы сократить время, необходимо оперировать. Более высокий уровень медицины сокращает время. - Работайте с набором, чтобы сократить время заживления, или с духовкой, если у вас есть черта храбрости или хотя бы 6 в силе. (Печь заживает мгновенно, но оставляет неизгладимый след, она должна быть включена и иметь температуру не менее 250°C) -После исцеления вы можете экипировать протез, и действия займут меньше времени. Вы также получаете черты храбрости и нечувствительности к боли. -Перки за уровень владения протезами, со временем увеличивается, если протез установлен. Более высокий уровень сокращает время действий Что я планирую добавить - Предотвратите вождение, если отсутствуют две руки, и снизьте скорость на 15%, если отсутствует одна, не влияет, если установлены протезы. -Добавить место для установки пистолета на металлический крюк цевья и металлическую руку -3D модель для карты -Атака оружием во второй руке -Долговечность протезов - Заставьте зомби начать с порезанной руки - Улучшенная текстура предплечья -Лучшая модель -Лучшие иконки -Лучший звук -Меньше ошибок -Ноги Workshop ID: 2837502319 Mod ID: Amputation
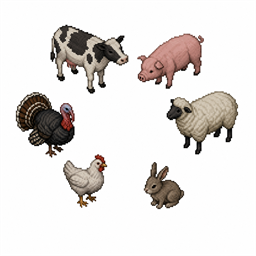
Visible Animal Disorders and Stats
von 76561199179789118
New and Improved for 42.20! I made this mod to show hidden animal values that I feel should be visible, such as expressed disorders, statistics like age, egg progress, and player acceptance, and full animal genomes. I’ve grouped disorders into three categories: “Simple Disorders,” which are easy to detect, “Complex Disorders,” which would require long-term observation, and “Health Disorders,” which would require veterinary-level animal experience to see. Expressed disorders will be seen in red near the bottom of the Animal Info panel. Please note that some disorders do the opposite of what their name suggests, while many do nothing at all. Please see the “Gene and Disorder Info” discussion post for further info on each gene and disorder. Simple Disorders Viewable at animal care level 4 by default, and are as follows: noWool (No Wool), poorwool (Poor Wool), dwarf (Dwarfism), skinny (Skinny), fidget (Fidgety), craven (Craven), bony (Bony), and slowWalking (Slow Walking) Complex Disorders Viewable at animal care level 6 by default, and are as follows: noEggs (No Eggs), noMilk (No Milk), poorMilk (Poor Milk), smallEggs (Small Eggs), gluttonous (Gluttonous), highThirst (High Thirst), weak (Weak), growSlow (Slow Growing), idiot (Idiot), blind (Blind), highStress (High Stress), bully (Bully), and strong (Strong) Health Disorders Viewable at animal care level 8 by default, and are as follows: poorLife (Poor Life), poorFertility (Poor Fertility), fertile (Fertile), sterile (Sterile), and feeble (Feeble) Player Acceptance At animal care level 6 by default, player acceptance shows in the Animal Info panel as: “Wary of You” (0-29) > “Neutral” (30-49) > “Likes You” (50-69) > “Loves You” (70-89) > “Adores You” (90-100). Egg Progress At level 8 by default, egg progress shows in egg tooltip as: no info (0-25%) > “Fertilized: Beginning” (26-45%) > “Fertilized: Halfway There” (46-65%) > “Fertilized: Almost Ready” (66-85%) > “Fertilized: About to Hatch” (86-100%) Animal Age Also at level 8 by default, animal age shows in the animal info panel to the right of the animal’s growth stage, in months when the animal is under a year old, and in years when they surpass one year. Sandbox Options With “Simple View Genetics” sandbox option enabled, “View Genetics” will be available for any animal in their context submenu at level 10 by default. With this option disabled, you will instead see the DNA sequencing crafting chain to unlock “View Genetics” on each animal, which starts with taking a tissue sample. More info on DNA sequencing can be found in the discussion post “DNA Sequencing Steps.” View Genetics, View Simple Disorders, View Complex Disorders, View Health Disorders, View Player Acceptance, View Egg Progress, and View Animal Age, are all new sandbox settings that allow you to toggle what animal care level you’d like to be able to see each feature. All range from 0-10 with the exception of View Egg Progress, which has a minimum level of 3, and View Animal Age, with a minimum level of 4. Discord: https://discord.gg/tTMZHtpThs Shyne and Enry are going on vacation! Woohoo!! We will be away from home from September 1st to September 6th, and while we will have our laptops/phones to provide general support, mods will likely not be updated during this time. If you notice any bugs in this time, please be patient, and if they are game breaking, you will just have to disable the mod in question for the time being. Please still feel free to send bug reports and console logs in the discord, just know they will likely not be fully reviewed until September 7th. Workshop ID: 3745649635 Mod ID: VisibleAnimalDisorders
![WwS's Cat Ears Headband [41|42.12] – Project Zomboid Mod](https://images.steamusercontent.com/ugc/10446626322599763575/E416F651F0E62F74001D5F8880A9729DF9786D37/)
WwS's Cat Ears Headband [41|42.12]
von 76561198148492204
Don't know when, but i will try to update mod to version 42.13 -For now available up to version 42.12!! Hello there o/ The set contains cat ears headband in a few color variants: -Black -White -Grey -Ginger -Mix There's a chance you might find the headbands in: -Wardrobes (man, woman, classy, child) -Strip club dressers -Hair Salon counter -Safehouses counter -Locker classy -School lockers -Crate clothes -Crate costume -Lingerie store outfit -Lingerie store accessories -Clothing stores summer -Clothing stores headwear -Clothing storage headwear -Closet shelf generic -Bedroom dresser -Bathroom shelf -Bathroom counter -Bathroom cabinet -Band practice clothing -Band merch clothes -Band merch shelves If you add this mod to the game, the headbands should spawn in areas you haven’t visited before. It shouldn't affect your save. I'm new here and just trying to figure out how it all works. If there are any problems, let me know in the comments. I will try to fix it. If you like the mod, please consider supporting me! Have fun playing! Ko-Fi Contact me via comment section. In the preview images, I used base game clothes and 2 hairstyles from my mod;. Please be aware that it is prohibited to republish, copy this content. Workshop ID: 3492758571 Mod ID: WwSCatEarsHeadband

Korone Alarm Replacer
von 76561198055272054
Replaces alarm sound with Korone beeps :D Workshop ID: 2824565996 Mod ID: KoroneAlarmReplacer
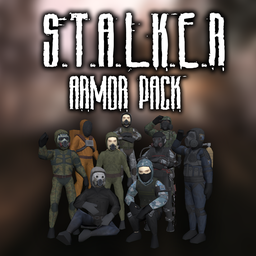
STALKER Armor Pack B42.20.2 Full Audit
von 76561199040151452
Original Mod https://steamcommunity.com/sharedfiles/filedetails/?id=2831715402 Author of the mod: https://steamcommunity.com/id/KyneWrath Build 42.20.2 multiplayer compatibility audit of STALKER Armor Pack. Includes stronger protection, B42 body-location registries, safe loot injection, JSON localization, asset/GUID/case fixes, and corrected item/model references. this mod still has a few bugs, with some textures not working, but alot of the stuff dose work as far as wearables this was my first time ever trying to patch anything so spare me Workshop ID: 3780092956 Mod ID: StalkerArmorPack Mod ID: StalkerArmorPackMoreSpawns01 Mod ID: StalkerArmorPackMoreSpawns02
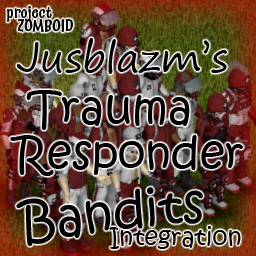
Trauma Responder Bandits Integration
von 76561198096995823
Jusblazm's Trauma Responder Bandits This mod provides Bandits wearing modded clothing from Trauma Responder Uniform. Updates I plan to release a new update on the 2nd of each month. This update will replace the current batch of bandits with a brand new batch. This will not harm your saves, nor will it affect currently spawned bandits. Freshly spawned bandits will be wearing gear according to the new list. This will provide some, hopefully noticeable change to extended saves. Compatibility Absolutely no mod conflicts with two caveats: - someone uses my naming convention for their own integration. - A unique ID generates a dupe (Wikipedia: the probability to find a duplicate within 103 trillion version-4 UUIDs is one in a billion) Known Issues - Errors appear when opening the clan in Bandits Creator. These errors are harmless, it happens because the bandits are wearing clothing that cannot be displayed in Creator, like custom locations. Do not edit them or you will delete the clothing not being displayed. GitHub Archive I will be keeping an archive of each update's bandits.txt and clans.txt files, so that if there is a set you really like, you can continue to use them even after the mod updates and moves away from them. GitHub Archive Permissions I created a simple extension for Bandits NPC that allows bandits to wear the custom equipment slots provided by Caution Uniform and I created a patch to fix the broken inventory icon for Trauma Responder Storm Pack . The item IDs belong to Jordanal and Galodar's Trauma Responder Uniform, the BodyLocations belong to Jordanal and Galodar's Trauma Responder Uniform and KATTAJ1's Clothes Core, and Slayer's Bandits NPC reads the text files. Both Trauma Responder Uniform and Bandits NPC have the default permissions of Credit where it's due, so I am extending their permissions. Be sure to credit them for their hard work. Credits The Indie Stone for Project Zomboid Slayer for Bandits NPC and Bandits Creator Jordanal and Galodar for Trauma Responder Uniform Workshop ID: 3485867985 Mod ID: JusBanditsJGTraumaRANDOM
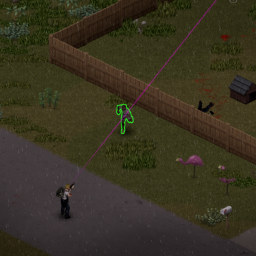
Laser Visualization
von 76561198998855468
Displays a auxiliary line when using firearms attached with laser. Supports all ranged weapons attached with laser, including weapons from firearm mods, as long as the attachment ID in the "Canon" or "Clip" or "Stock" model position contains the "laser" string to trigger Efficient rendering that doesn't affect game framerate Supports multiplayer, other players can see your aiming lines You can customize opacity and RGB color of laser in sandbox `Laser Visualization` page Recommended mod: Player Bullet Tracer https://steamcommunity.com/sharedfiles/filedetails/?id=3553844757 Workshop ID: 3562911143 Mod ID: LaserTracer

Grapeseed (RU)
von 76561198212702180
Локализирует мод добавляющий город "Grapeseed" (Ссылка на оригинальный мод ниже описании, для работы локализатора требуется обязательно!!!) Original author mod ( needed for working ) : https://steamcommunity.com/sharedfiles/filedetails/?id=2463499011 Оригинальный мод от автора ( без оригинального мода локализация работать не будет ) : https://steamcommunity.com/sharedfiles/filedetails/?id=2463499011 Workshop ID: 2738384898 Mod ID: GrapeseedRU
Project Zomboid Details →
Project Zomboid Guides
Project Zomboid Mods installieren - Workshop Guide
Installiere Project-Zomboid-Mods sauber per Steam Workshop: IDs eintragen, Reihenfolge prüfen, Server neu starten und typische Fehler beheben.
Project Zomboid Build 42 auf dem eigenen Server: Umstieg, Spielstände und Mods
Build 42 ist Stable: Spielstände aus Build 41 sind nicht kompatibel. Umstieg, legacy41-Zweig, neue Serveroptionen, Anti-Cheat und der Hotfix 42.20.1 gegen Serverlag.
Project Zomboid Server mieten – Multiplayer Guide
Project Zomboid Server einrichten: RAM, Sandbox-Einstellungen, Workshop-Mods, Admin-Rechte und typische Fehler sauber prüfen.
Project Zomboid Server mit Mod-Support
Kompatible, unterstützte Mods über das Server-Dashboard installieren.
Project Zomboid Server mieten