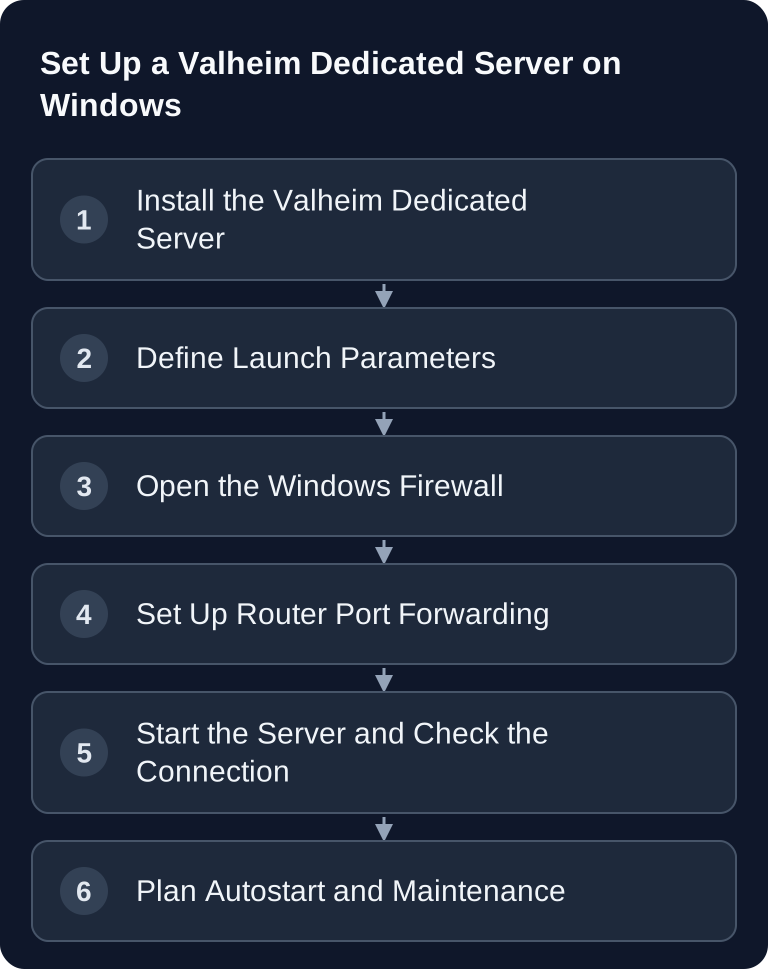
A Valheim dedicated server on Windows can be installed either via Steam Tools or via SteamCMD. What matters is a separate start script, correctly set server parameters, open UDP ports 2456-2457 and a test of firewall, router and connection. For permanent hosting, you should also deliberately plan for updates, backups, power supply and security risks.
Requirements
You need a Windows PC or Windows server on which the Valheim dedicated server is allowed to run permanently. You also need administrator rights for the Windows firewall and router, access to Steam or SteamCMD, and a stable internet connection with enough upload for your fellow players. If the server should be reachable from outside your home network, your connection must allow incoming connections. With DS-Lite, carrier-grade NAT or restrictive ISP routers, classic port forwarding can fail.
The official Valheim documentation explains in the guide “A Guide to Dedicated Servers” that the server's default port range is 2456-2457 and that with the Steam backend it must be reachable via port forwarding: Documentation at valheim.com. The same source notes that crossplay works via a relay and then needs no router port forwarding for external reachability. So first check whether you want to use the Steam backend or crossplay.
If you don't want to administer it yourself, a rented Valheim server at game-serverhosting is the more controlled way to run it: you get multi-game hosting with technical control, support and clear processes for operation and configuration. A practical introduction is in the guide Rent and Set Up a Valheim Server – Co-op Guide 2026.
Method 1: Installation via Steam
- Open Steam and go to the Library.
- In the filter or dropdown, enable the “Tools” category.
- Install “Valheim Dedicated Server”.
- Open the installation folder and work with a copy of the supplied start file, not directly with the original file.
You can set launch options, for example:
-name "My Server" -world "World" -password "YOUR_OWN_LONG_PASSWORD" -port 2456
For real operation, the password should not be trivial. Also use a unique world name so that you don't accidentally create a new world or start the wrong one.
Method 2: Installation via SteamCMD
SteamCMD is often more practical for server operation because updates and revalidation run reproducibly via commands. Install SteamCMD in its own folder and then run:
:: Download and install SteamCMD
steamcmd.exe +login anonymous +app_update 896660 validate +quit
If you want to control the installation folder explicitly, add a suitable +force_install_dir path. Stop the server before updates so that no world files are modified while being written.
Creating the Start Script
Create the batch file start_valheim.bat in the server folder next to valheim_server.exe. The following example assumes exactly this location:
@echo off
cd /d "%~dp0"
"valheim_server.exe" -nographics -batchmode -name "Server" -port 2456 -world "World" -password "YOUR_OWN_LONG_PASSWORD" -public 1
Adjust at least -name, -world and -password. -public 1 makes the server publicly discoverable, provided the network and backend allow it. If you only want to run the server privately, check whether -public 0 fits your desired connection method.
Opening Ports
In the default case, Valheim requires these ports:
| Port | Protocol | Usage |
|---|---|---|
| 2456 | UDP | Game traffic |
| 2457 | UDP | Query |
Windows Firewall
Open PowerShell or a Command Prompt with administrator rights and create an inbound rule:
netsh advfirewall firewall add rule name="Valheim" dir=in action=allow protocol=UDP localport=2456-2457
If you use a different start port, the opened range must match. According to the official documentation, Valheim uses the specified port and additionally port+1.
Router
- Open the router admin (192.168.1.1)
- Port forwarding → UDP 2456-2457 → Your local IP
The router address may differ; many home routers also use 192.168.0.1 or a manufacturer domain. What matters is that the local IP of the Windows server stays stable, for example via a DHCP reservation. Don't forward unnecessary TCP ports if you don't need them for Valheim.
Setting Up Autostart
Place a shortcut to the batch file in the Windows Startup folder if the server should start when this user logs in. To do so, open shell:startup via Win+R and link start_valheim.bat. For a start without user login, set up a Windows task with the trigger “At system startup”, suitable execution rights and the server folder as the working directory. Test it after a restart.
Also plan maintenance windows. With a Steam installation, Steam updates the dedicated server like other tools. With SteamCMD, you run app_update 896660 validate again. Before every update, you should shut down the server cleanly and back up a copy of the Valheim save folder.
Verifying the Result
Place the script in the server folder; cd /d "%~dp0" sets the working directory to this folder at startup. Watch the console until it reaches the ready state. With the Steam backend, first test on the LAN and then with an external client. With the crossplay backend, use the join code or public address: a local/loopback test can fail there even though the server is working.
If you want to set up admin commands, moderation and permissions properly, the guide Valheim Server Commands – All Admin Commands will help you. For further configuration, mods and boss progression, Rent a Valheim Server: Mods, Configuration & Boss Order 2026 is a good fit.
Troubleshooting
Server doesn't appear in the list
First check whether -public 1 is set and whether the server is running without errors. Then check the Windows firewall, router forwarding and public reachability. Server lists may update with a delay; a direct connection test is often more meaningful.
Friends can't connect
If local connections work but external ones don't, the problem is usually port forwarding, ISP NAT or a wrong target IP in the router. Compare the router forwarding with the local IP of your Windows server and check whether your internet connection allows incoming UDP connections.
The world doesn't start as expected
Check the value of -world. A different name creates or loads a different world. Before making changes, back up the Valheim save folder so you can roll back in case of a misconfiguration.
Server closes after starting
Start the batch file from an already open Command Prompt so that error messages stay visible. Common causes are wrong paths, missing files, ports already in use or invalid parameters.
Downsides of Self-Hosting
- Power: PC has to run 24/7
- Internet: Your upload bandwidth limits the players
- Security: Your PC is reachable from the internet
- Maintenance: Install updates manually
Rented Server as an Alternative
Self-hosting makes sense if you want to learn, test or take full responsibility for your own Windows environment. For regular co-op sessions, a rented server is often easier to run, because hardware, reachability, support channels and operating processes are not tied to your private PC. At game-serverhosting, the focus is on paid multi-game hosting with technical control and transparent management rather than improvised home-server operation.
FAQ
Do I absolutely need SteamCMD?
No. You can also install the Valheim dedicated server via Steam Tools. SteamCMD is mainly useful if you want to control updates and installation clearly via commands.
Which ports do I need to open?
In the default case, Valheim uses UDP 2456 and 2457. If you set a different -port, the server uses that port and additionally port+1.
Do I also need to set up port forwarding for crossplay?
According to the official Valheim documentation, crossplay needs no router port forwarding for external reachability, because the connection runs via a relay. The port remains relevant, however, for distinguishing multiple servers.
Can I start the server automatically after a Windows restart?
The Startup folder only launches the shortcut at user login. For a start without login, use a Windows task configured for that and set the working directory to the server folder; check the execution after a restart.
What's important before updates?
Stop the server cleanly and back up your world files. Then you can update via Steam or, with SteamCMD, run app_update 896660 validate.