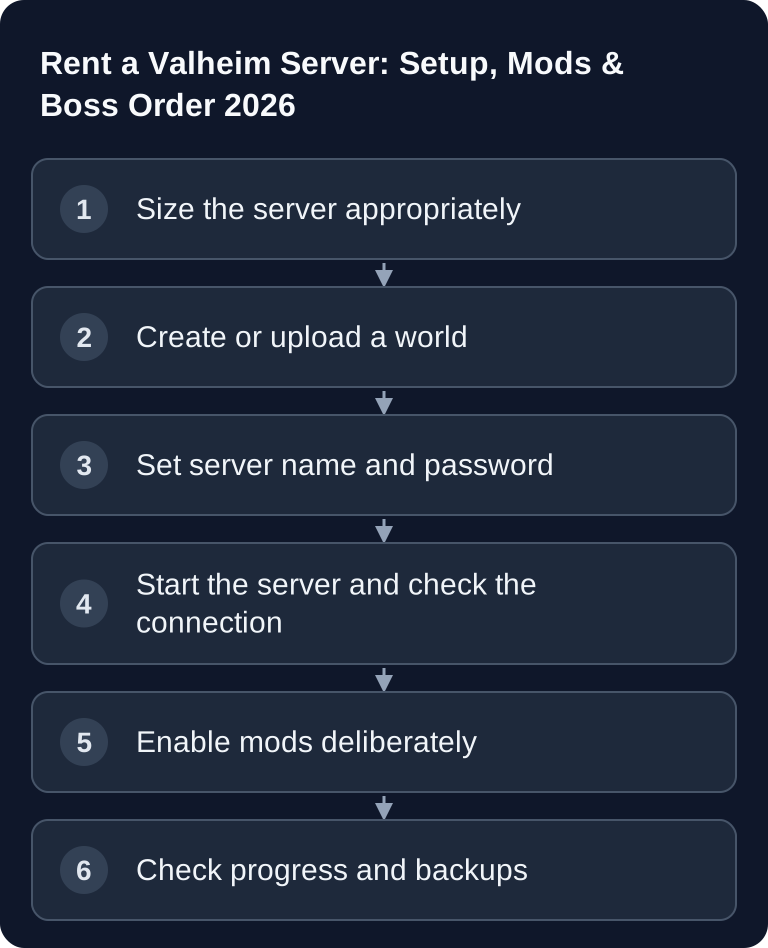
A rented Valheim server is worth it if you want your world to be available around the clock and don't want to rely on one player's PC as the host every time. What matters most is sensible RAM planning, a correctly set password, clean backups and a mod configuration that all your teammates can use identically.
Valheim 1.0
Valheim 1.0 was released on September 9, 2026 with Deep North. The boss list further below only describes earlier progression up to Mistlands and is no longer a complete endgame list since 1.0: Ashlands and Deep North follow. Old worlds remain playable; according to Iron Gate, new biome areas only generate correctly in previously unexplored regions. Back up your world before the update and test mods one by one.
Valheim 1.0 is here: Deep North, worlds and server update · Valheim 1.0: Safely checking the server update, old world and mods
Requirements
For a stable start you need a Valheim installation, an existing or new world, a unique server name and a server password. The official Valheim guide for dedicated servers lists the central launch parameters, including -name, -port, -world, -password, -public, -saveinterval and backup options: Documentation at valheimgame.com
If you use game-serverhosting, the focus isn't on tinkering but on controllable operation: you rent a paid multi-game server, manage configuration and files in one place and can involve support and traceable processes when problems arise. This doesn't replace a clean setup, but it makes maintenance and troubleshooting much more organized.
RAM Recommendation
The following table from the original version is kept as a pragmatic guideline. It is not a guarantee for every world size, mod combination or player activity, but a sensible starting point for typical co-op scenarios.
| Players | RAM |
|---|---|
| 1-5 | 4 GB |
| 5-10 | 6 GB |
| Modded | 8 GB |
More RAM becomes relevant mainly when many players enter large bases at the same time, many objects are located in one area or mods load additional systems. If your world has already been played for a long time, plan conservatively and watch restarts, loading times and connection drops after the move.
Setting Up a Valheim Server
1. Order the server and define the basics
Choose the server so that player count and mod plans fit together. For a small co-op group, the 4 GB tier from the table is often enough. If you want to start with mods right away, 8 GB is a more sensible starting point. Then set the server name, world name and password. The password should be at least 5 characters long; don't use one that is obviously identical to the server or world name.
2. Start a new world or upload a singleplayer world
You can have a new world generated or take over an existing singleplayer world. When uploading, it's important that the matching world files are transferred completely and that the server uses exactly that world name. Then restart the server once and check in the game whether the spawn point, buildings and explored areas load correctly.
3. Test the connection
First choose the server backend. Without -crossplay, only Steam players can join. With -crossplay, the connection runs through PlayFab; a join code, the server list or a public IP with port are suitable for this. According to Iron Gate's guide, a local or loopback IP does not work for this crossplay route. Check the full startup before you pass the address on to your group.
4. Check backups and restarts
Before you actively play the world with your group, test at least one controlled restart. Build or change something small, wait for a save cycle, restart the server and then check whether the change was preserved. This way you'll quickly see whether the world path, write permissions or backup process are misconfigured.
Boss Order
The boss order structures your progression. The following list is kept as a guide to game progression:
- Eikthyr — Copper and tin
- The Elder — Iron smelting
- Bonemass — Mining silver
- Moder — Artisan table
- Yagluth — Plains
- The Queen — Mistlands
The list deliberately ends here; Ashlands and Deep North follow afterwards.
Plan server rules around this order. In co-op groups it often makes sense to trigger boss fights only together, so that new materials, raids and world progression don't overwhelm individual players. If you look after several survival groups, you'll find similar planning questions in the ARK server guide for settings, mods and RAM or in the Palworld server guide for configuration and multiplayer.
Valheim Plus and Mods
Valheim Plus can change convenience features and balancing values. Only install mods once your unmodified world starts cleanly and a backup exists. Client and server must also be compatible: if a player uses different mod versions, connection problems or deviating behavior quickly arise.
The existing example block is kept:
[Player]
autoRepair = true
deathPenaltyMultiplier = 50

[Resources]
dropMultiplier = 2.0
autoRepair = true is a convenience option. deathPenaltyMultiplier = 50 changes the death penalty. dropMultiplier = 2.0 significantly increases resource drops and thus directly affects progression and balancing. Set such values deliberately and document them for your group, so everyone knows whether the world is played closer to vanilla or accelerated.
Verify the Result
After setup, a player with the correct password should be able to connect, see the right world and find the same world state after a restart. Also check whether the server console shows any persistent errors, whether backups are created and whether mods still work after a client restart. For other co-op setups with similar maintenance needs, the Minecraft server guide for the complete setup is a good point of comparison.
Troubleshooting
Server doesn't appear in the list
First compare the backend and client platform: a Steam server without -crossplay is not the right target server for a Game Pass client. With the crossplay backend, test the join code or the public address; with the Steam backend, test the assigned address and ports. Also check whether -public sets the desired visibility and whether the console confirms the server is ready.
Password is rejected
Set a new password with at least 5 characters and restart the server. Avoid special cases such as a password that matches the server name or is copied incorrectly by players.
World state is missing after the upload
Check whether the world files were transferred completely and the configured world name matches exactly. Then stop the server, inspect the files and start it again.
Mods don't work
Compare mod versions on the server and clients. As a test, disable all mods, start the world as vanilla and then enable only one change at a time.
FAQ
How much RAM does a Valheim server need?
For 1-5 players, 4 GB is a sensible starting point. For 5-10 players, 6 GB is more appropriate. With mods or large, long-played worlds, you should plan for 8 GB.
Can I upload my singleplayer world to the server?
Yes. Upload the complete world files and make sure the server uses the same world name. Afterwards, check directly in the game whether buildings and progress are present.
Do I absolutely need Valheim Plus?
No. Valheim Plus is optional. Start with a working vanilla world first and only enable mods afterwards, once backups and connection have been checked.
Which boss order makes sense?
Up to Mistlands, the order is Eikthyr, The Elder, Bonemass, Moder, Yagluth and The Queen. Ashlands and Deep North follow after that. Use it as a group roadmap so that progression and difficulty stay clear for everyone.
What do I do if players can't connect?
First check the server status, password, IP and port. Then check mod versions and test a direct connection. If the world is modded, a short vanilla test helps narrow down the cause.