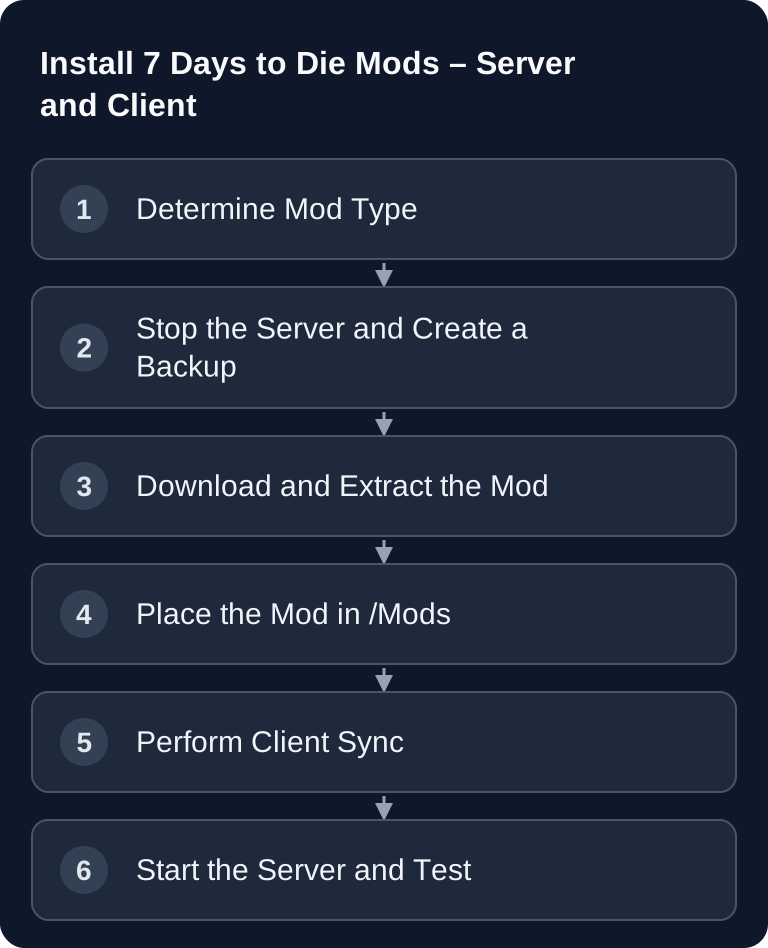
You install mods for 7 Days to Die reliably if you first clarify the mod type, stop the server, create a backup and place each mod as its own folder in /Mods. What matters is the correct folder structure with ModInfo.xml, matching game and mod versions, and a clean test with a compatibly set-up client.
Requirements
Before you add mods, you should have access to the server files, the server console or logs, and your local 7 Days to Die installation. Also plan a backup: at least the world state, server configuration and existing Mods folder should be saved. On a rented game-serverhosting server, you usually handle file transfer, restart and verification via the provided management tools; it is still important not to force changes while the game is running.
As a technical reference, the community documentation in the 7 Days to Die wiki is helpful. The Mod Interface page describes that mods belong in a Mods folder in the main game directory and that each mod needs its own folder with ModInfo.xml: Documentation at 7daystodie.wiki.gg. For modlets, the modlet guide in the same wiki adds that the mod folder is recognized by the contained ModInfo.xml: Documentation at 7daystodie.wiki.gg.
Identify Mod Types
| Type | Installation | Client required? |
|---|---|---|
| XML Modlets | In /Mods folder |
Depends on the content |
| Overhaul Mods | Full replacement | Yes |
| Server-Only | In /Mods folder |
No |
XML modlets often change configuration data such as items, recipes, loot, blocks or balancing. Pure XML changes can work server-side as soon as the server loads them at startup. However, if a mod contains its own icons, asset bundles, UI files or code components, clients often have to install the same mod. So do not rely only on the mod name, but read the installation notes of the respective mod.
Overhaul mods intervene much more deeply. They often change progression, crafting, enemies, world generation, UI and items. Such packages usually have to be installed on server and client in exactly compatible versions. Server-only mods, on the other hand, are intended for administration, logging, moderation or server-side rules and work without a client installation, unless the mod documentation says otherwise.
Install Modlets
- Download the modlet, for example from 7daystodiemods.com, and check compatibility with your 7 Days to Die version.
- Stop the server completely. A restart is not enough if files are replaced while the process is running.
- Extract the archive locally and open the extracted folder. Look for
ModInfo.xml. - Copy the folder that directly contains the
ModInfo.xmlinto the server's/Modsdirectory. - If
/Modsdoes not exist yet, create the folder in the server's main directory, not insideDataorConfig. - Restart the server and check the log for mod loading errors.
The most common source of errors is an additional packaging level. For example, /Mods/MyMod-v1/MyMod/ModInfo.xml would be wrong if the actual mod folder is MyMod. The correct path is then /Mods/MyMod/ModInfo.xml.
Deploy Overhaul Mods Cleanly
| Mod | Description |
|---|---|
| Darkness Falls | Hardcore with new classes |
| Undead Legacy | Realistic crafting |
| Ravenhearst | Harder, more realistic |
| War of the Walkers | New items and zombies |
With overhaul mods, you should be especially strict. First check whether the mod matches the installed 7 Days to Die version. Then install it on the server and on every client following the instructions of the respective mod project. If an overhaul mod requires its own launcher or additional installation steps, follow those instructions instead of a generic modlet installation.
For existing worlds: large overhauls can change world states, progression and items significantly. If possible, start with a new world or test the mod in a separate copy. On production community servers, a clear maintenance window makes sense so that players know which client mods they need and when the server will be reachable again.
Server-Only Mods
According to their respective project guides, server-side management mods do not need a player client. Do not confuse an external management application with a mod folder: CSMM manages the server from the outside and is not copied into /Mods like a mod JAR or DLL. The CSMM project description describes it as a web-based management and monitoring portal.
- Server Tools – Admin tools
- Allocs Server Fixes – Performance and web map
- CSMM – Server management
Server-only mods are especially handy for administrative tasks because players do not have to install files themselves. Still, after every change you should check whether the mod matches the current server version and whether it causes conflicts with tools that are already installed.
Verify the Result
After the restart, you first connect to the server yourself. Check whether the server appears in the list, whether joining works and whether the world loads without an error message. Then you specifically test what the mod is supposed to change: new items, recipes, UI windows, commands, zombies, loot tables or admin functions.
Also check the server logs. Warnings about a missing ModInfo.xml, XML errors, invalid paths or version conflicts indicate that the mod was not loaded correctly. If several mods are installed, test individually when problems arise: first remove all new mods, then re-enable one mod at a time.
Troubleshooting
Mod Is Not Loaded
First check the folder structure. The file ModInfo.xml must be located directly in the respective mod folder. Also, the Mods folder belongs in the main directory of the server installation. If it is under Data, Config or in an additional archive sublevel, the mod is often not recognized.
Players Cannot Join
In this case, the client is usually missing a required mod, or server and client use different versions. Compare the mod list, game version and installation paths. With overhauls, all players should use the same package version.
Server No Longer Starts After a Mod
Stop the server and back up the log, mod list and save game. First isolate the most recently changed mod using a world copy, so that starting without the content mod does not save missing items or blocks into your only save. Then check game/mod version, required dependencies and the anti-cheat setting required by the mod project.
Multiple Mods Overwrite the Same Content
Conflicts often arise when several mods change the same XML areas, UI files or progression systems. Reduce the mod list to the necessary packages and test the order or combination. With large overhauls, you should only use additional gameplay mods if they are explicitly compatible.
More Modding Guides
If you run several survival servers, similar workflows also help with other games. For cross-checks on client and server mods, you will find matching guides for Installing Palworld Mods, V Rising BepInEx Server Mods and Installing Factorio Mods on the Server. The details differ, but backup, version checking and a controlled restart remain the most important steps.
FAQ
Does every player have to install 7 Days to Die mods?
Not always. Pure server-side management mods usually do not need a client. Overhauls and mods with assets, UI changes or their own files normally also have to be installed on all players' machines.
Where is the correct Mods folder?
The folder is called Mods and is located in the main directory of the 7 Days to Die installation or the dedicated server. It does not belong in Data or Config.
Can I install mods on an existing world?
Small modlets can work, but you should create a backup beforehand. You should test large overhauls with a new world if possible, because they can change progression, items and world behavior significantly.
What do I do in case of a version conflict?
First check the game version, mod version and installation notes of the mod. Do not blindly update all mods at the same time; instead, test changes individually and keep a working backup ready.
Can I combine multiple overhaul mods?
That is usually not a good basis for a stable server. Overhauls change many core systems at the same time. Only combine them if the mod projects involved explicitly support that combination.