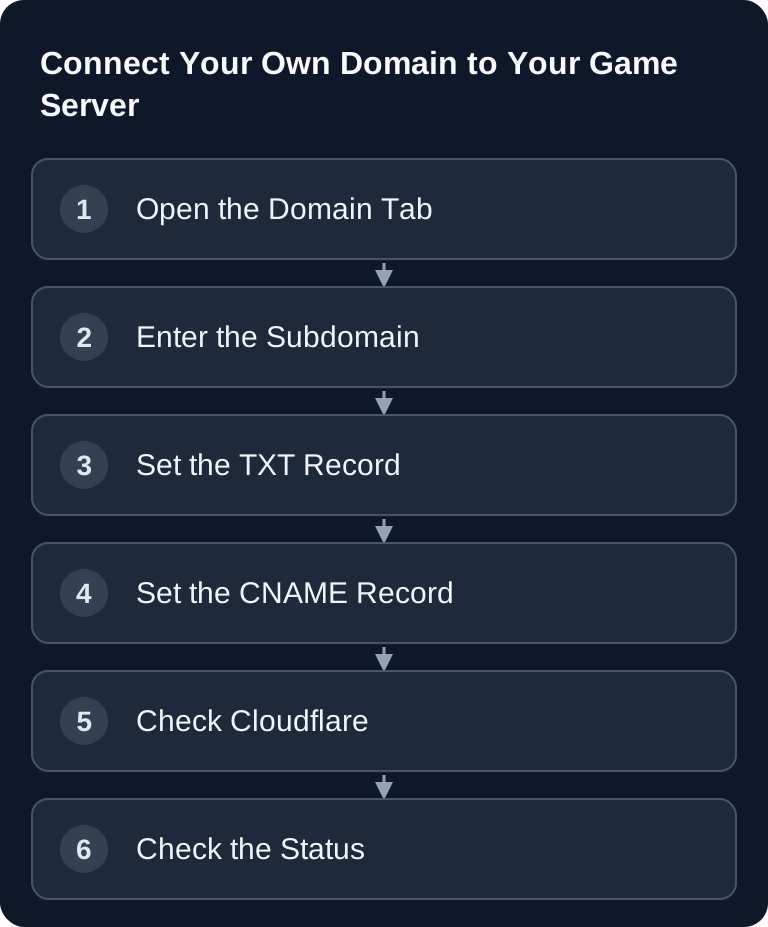
With a custom domain, you connect your game server via an easy-to-remember address like play.your-domain.com instead of sending players an IP with a port. At game-serverhosting, you set up a domain connection in the dashboard, confirm domain ownership via a TXT record and point the subdomain to the displayed target address via CNAME.
Requirements
You need access to the server dashboard at game-serverhosting and to the DNS management of your domain. This can be your domain registrar, a hosting panel or a DNS service like Cloudflare. You should also decide in advance which subdomain you want to use. For game servers, a subdomain like play.my-site.com, mc.my-site.com or server.my-site.com is usually the cleanest solution.
An apex domain like my-site.com is generally unsuitable for this setup, because classic CNAME records are not permitted at the zone apex or are only supported by the provider through special alias/flattening features. Therefore preferably use a subdomain. If you also run a website, shop or community page, this keeps the main domain independent of the game server.
Connecting the Domain in the Dashboard
Open your server dashboard and click the Domain tab. Enter your desired domain or subdomain there, for example play.my-site.com, and click Connect Domain. The system then generates the DNS values that you need to enter at your DNS provider.
Verification runs via a TXT record. This record proves that you control the domain. In addition, you set a CNAME record that points the chosen subdomain to the target address displayed by game-serverhosting. The specific values from your dashboard are authoritative; do not copy them from examples if your dashboard shows different values.
DNS Records Overview
| Type | Name | Value | Purpose |
|---|---|---|---|
| TXT | _gsh-verify.play.example.com |
gsh-verify-abc123... |
Ownership proof |
| CNAME | play.example.com |
mc-a16750.gs.game-serverhosting.com |
Forwarding |
With many DNS providers, you only enter the subdomain part in the Name field, for example play instead of play.example.com. Other providers expect the full hostname. If you are unsure, check the preview of your DNS panel: in the end, the full name must match your desired subdomain exactly.
Setting Up Cloudflare Correctly
If your domain is managed through Cloudflare, the CNAME for the game server must be set to DNS only, recognizable by the gray cloud. The orange Cloudflare proxy is intended for HTTP and HTTPS web traffic and not for regular game traffic. Cloudflare describes in its official documentation that the proxy status controls whether HTTP/HTTPS traffic runs through Cloudflare or points directly to the origin: documentation at developers.cloudflare.com
Therefore do not set the game server record to Proxied. TXT records are independent of this; they only serve verification and are not used as a game connection. If you maintain several records with the same name, make sure that no conflicting proxy configuration arises.
DNS Propagation and Status in the Dashboard
After saving, DNS checks continue to run regularly; in the intended process, about every two minutes. Existing DNS caches follow the earlier TTL and can return an old answer for longer. So don't blindly wait for a fixed 24-hour period: first check the TXT name and the target publicly, and then compare the status in the dashboard.
In the Domain tab you can see the live status:
- Pending: The DNS check is still waiting for proof of ownership.
- Verifying: The TXT proof has been seen, the target resolution is still being checked.
- Verified: Proof of ownership and target assignment are confirmed.
- Failed: The required records were not confirmed within the check period; check the displayed cause.
When the status shows Verified, the domain connection is active from the dashboard's point of view. Afterwards, also test in the game client whether you can connect via the new address. If your game still requires a port, specify it in the client as usual, unless the game or your setup supports automatic port resolution.
Verifying the Result
First check whether the TXT record is publicly visible. Many DNS providers show saved records immediately in the panel, but what matters is whether they can be retrieved via public DNS resolvers. Then check whether the CNAME of your subdomain points to the target address displayed in the dashboard. If both values match, the status should switch to Verified on the next check run.
Then test establishing a connection with exactly the address you set up. So use play.my-site.com and not the main domain by mistake. If players had previously saved an IP address, inform them about the new domain. The advantage: for later technical changes, you can adjust DNS without having to explain a new numeric address to all players.
Fixing Common Errors
If verification fails, the TXT record is usually named incorrectly, entered at the wrong DNS zone location or not yet propagated. Compare the name and value character by character with the dashboard. Pay particular attention to additional domain suffixes: some panels turn _gsh-verify.play.example.com into _gsh-verify.play.example.com.example.com by mistake if you enter the full name in a field that only expects the host part.
If the domain is verified but the connection in the game doesn't work, check the CNAME first. It must point to the displayed game-serverhosting target address, for example mc-a16750.gs.game-serverhosting.com. With Cloudflare, the record must be set to DNS only. Also check whether you are using the correct subdomain and, if applicable, the correct port in the game client.
If you are migrating files, worlds or configurations in parallel with the domain setup, the SFTP access to the game server for file management is relevant. For a general DNS overview, you will also find the guide Set up a custom domain for your game server. If you are coming from another provider, the Nitrado move to game-serverhosting helps with a clean migration.
Sources and Basis for Verification
The Cloudflare documentation explains the DNS and proxy rules. For proof of ownership and target assignment, the values generated in the Domain tab of the selected instance apply.
Limits and Rollback
Before making DNS changes, back up the existing records, values and TTLs. If the new domain does not connect, test the previous game address and, if needed, restore the backed-up DNS values. A world restore is not required for this. CNAME and verification also do not automatically create SRV support in the game client; use the displayed port if needed.
FAQ
Do I have to use a subdomain?
For this setup, a subdomain like play.my-site.com is recommended. Apex domains like my-site.com cannot be used directly via CNAME everywhere and more often lead to DNS special cases.
Why do I need a TXT record?
The TXT record confirms that you control the domain. Without this proof, someone could theoretically try to connect other people's domains to a server.
How long does activation take?
The dashboard checks every 2 minutes. DNS caches can delay changes; depending on the provider and TTL, it can take up to 24 hours, but often only a few minutes.
What does Failed mean in the Domain tab?
Failed means that proof of ownership or target assignment was not confirmed within the intended check period. The current process allows roughly six hours when the check runs regularly. Compare the displayed cause with the TXT and CNAME values and the responsible DNS zone. Afterwards, use the offered re-check; repeated identical DNS changes do not speed up old caches.
Does Cloudflare have to be disabled?
No, Cloudflare does not have to be disabled completely. However, the relevant game server CNAME should be set to DNS only, so that the subdomain is resolved directly via DNS and does not run through the Cloudflare HTTP proxy.
Does the domain connection cost extra?
The domain connection is included free of charge at game-serverhosting. Additional costs can only arise externally, for example for your own domain at the registrar.