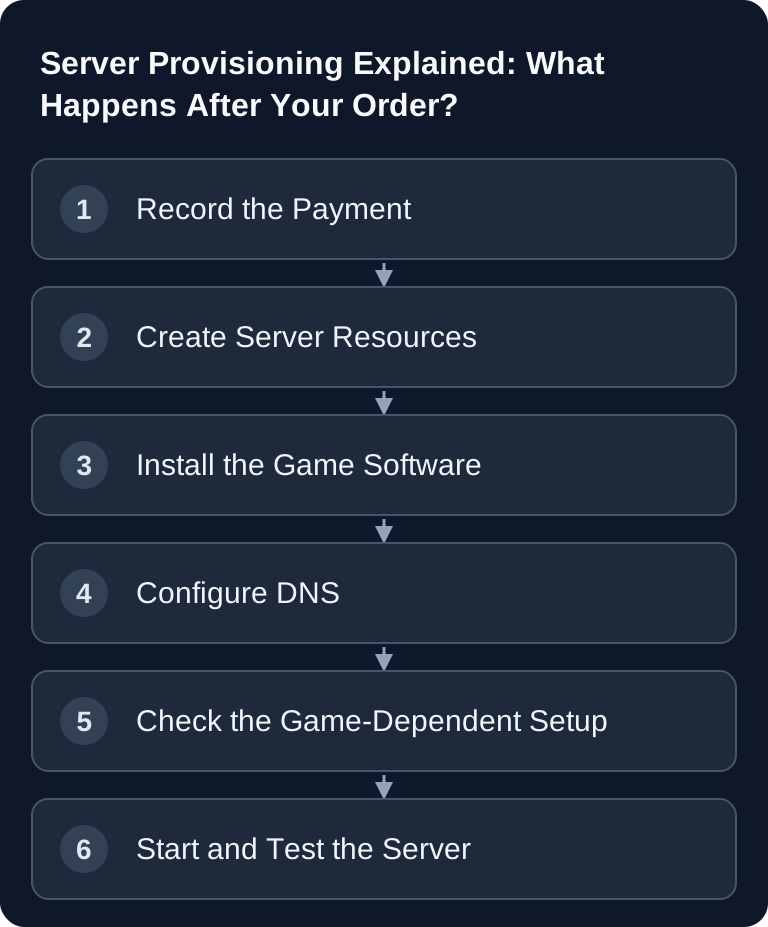
After you order and your payment is confirmed, you can follow the provisioning status in the GSH dashboard. Installation, DNS and additional game settings continue in the background, even if you close the browser. Ready means that you can check or start the instance; only a successful game start and client join confirm that your desired configuration works.
The Provisioning Phases at a Glance
| # | Phase | Status display | Typical duration |
|---|---|---|---|
| 1 | payment_received |
Payment received | 1–3 seconds |
| 2 | creating_server |
Server is being created | 30–60 seconds |
| 3 | installing |
Installing software | 30 sec – 30 min |
| 4 | creating_dns |
Configuring DNS | 10–30 seconds |
| 5 | setting_up |
Game setup | 0–3 minutes |
| 6 | ready |
Ready for checking or starting | – |
These times are approximate values from the provisioning process, not a guarantee. Phase 3 in particular can vary greatly, because game files, modpacks and Workshop content differ in size and are partly downloaded from external sources. With large modpacks such as ATM10 or FTB-Skies, as well as very large game images, the installation can take considerably longer than for a small vanilla server.
Requirements Before You Start
You need a completed order, a confirmed payment and access to your dashboard. For some games, additional information is required: CS2, for example, needs a GSLT token if the server is supposed to run publicly via Steam. For Minecraft, it matters whether Java, Bedrock cross-play or both variants are to be used, because this affects port and configuration topics.
If you want to configure things in more depth later, our guides on configuring Minecraft server.properties correctly and on Minecraft server ports, 25565, 19132 and SRV records will help. For Valheim, you'll find suitable admin basics at Valheim server commands and admin commands.
Phase 1: Payment Received (payment_received)
Once the payment is confirmed, your order is assigned to your account and provisioning is prepared. Check the order status and payment receipt before you order the same server again. A briefly delayed display doesn't mean the payment failed; if the status stays unchanged, support can check the assignment based on the order.
If this phase stays visible for longer, it usually isn't due to your browser. Wait a few minutes and then check in the dashboard whether the status has updated. If the payment stays in this state for an unusually long time, a support ticket makes sense so the assignment can be checked.
Phase 2: Server Is Being Created (creating_server)
The system reserves resources and the required game ports in the available region intended for your order. GSH operates infrastructure in Germany and France; the region offered or selected in the order step is what counts. A default stated in the guide confirms neither the availability of all regions at all times nor a later move of an existing instance. For Minecraft cross-play, Java TCP and Bedrock UDP must be assigned correctly and separately.
Pterodactyl then creates the server entry with the appropriate egg variables, such as game version, RAM limit and startup parameters. If no suitable slot is free or a node doesn't respond as expected, this phase can take longer. That is an infrastructure matter and shouldn't be solved by repeatedly reloading the browser.
Phase 3: Installing Software (installing)
The installation is usually the most variable part. The Wings daemon on the node runs the installation script of the respective egg and downloads the required files. The previous approximate values still apply:
- Minecraft Vanilla: ~60 seconds (downloading the server jar from Mojang)
- Modpacks (ATM10, FTB): 5–30 minutes (downloading several GB of mods)
- Rust: 5–15 minutes as a rough guide for SteamCMD server files; an additional custom map may need more download time
- ARK Survival Ascended: 10–25 minutes (large game image)
- CS2: 3–8 minutes (SteamCMD downloads CS2)
- Palworld: 4–10 minutes
These values depend on package size, source servers, updates and node load. In the meantime you can leave the page. The installation continues in the background, and you'll receive a notification as soon as the next status is reached.
Phase 4: Configuring DNS (creating_dns)
So that your server is reachable via a subdomain such as meinserver.gs.game-serverhosting.com, DNS records are created. Typical ones are:
- A record:
meinserver.gs.game-serverhosting.com→ IP address of your node - SRV record: game-specific, e.g.
_minecraft._tcp.meinserver→ port of your server
Cloudflare describes SRV records in its official DNS documentation as records that map service, protocol, target host and port: documentation at developers.cloudflare.com. This is exactly why supported clients can read the right port from DNS, instead of players having to type it in manually. If DNS fails, the server may still be reachable directly via IP and port.
Phase 5: Game-Specific Setup (setting_up)
After the base installation, game-dependent steps follow. For Minecraft, the eula.txt is taken into account, Geyser and Floodgate can be installed for Bedrock cross-play, and the server.properties is prepared with suitable ports. For CS2, an existing GSLT token is set in the STEAM_ACC variable. If you didn't enter the token in the wizard, you can add it later under "Settings". For FiveM, the txAdmin login URL is prepared.
If this phase fails, the cause is often more specific than in the general installation, such as a missing token or an invalid setting. Read the dashboard message carefully before making any changes.
Phase 6: Server Online (ready)
When ready is reached, you receive an email with the access details such as subdomain, port and Pterodactyl login. Optionally, a Discord notification can also be sent if it is enabled in your settings. In the dashboard, the server appears with the status Online or ready to start.
By default, the server doesn't necessarily start automatically after installation. That makes sense because you can still check settings before the first start, such as whitelist, server name, world options, ports, admins or mods.
Check the Result
First open the dashboard and check the status, IP, port and subdomain. Start the server, watch the console and wait until the game reports a successful start. Then connect in the client via subdomain or IP:Port. For Minecraft, you should additionally check whether Java and Bedrock players use their respective intended ports. For Palworld, it's worth taking a look at the Palworld server settings before you play with a group long-term.
Troubleshooting
If an installation runs for a long time, check the current dashboard status and the last visible message. Browser reloads or repeated orders don't speed up the running process. If an error is displayed or no progress is visible over a longer period, give support your order number, server name, visible phase and time. Don't rely on a blanket promise of an automatic recovery attempt; don't start a reinstallation while the original process is still active.
If DNS doesn't work yet, also test IP and port directly. If the game client can't connect, check whether the server has really started, whether the right port is being used and whether game-dependent required details are missing. If your server has been in the same phase for more than an hour, create a support ticket in the dashboard and state the server name, phase and time of the order.
FAQ
Can I close the browser while the server is being installed?
Yes. Provisioning continues on the server side. You can come back to the dashboard later and check the current status.
Why does the installation take longer for some games?
Because the required files differ in size and are partly downloaded from external sources. A vanilla server is set up faster than a large modpack or an extensive game image.
Do I have to start immediately after ready?
No. You can first check settings, verify ports, set admins or configure mods. This is especially useful for Minecraft, Valheim, Palworld and CS2.
What do I do if DNS doesn't work?
First test the direct connection via IP and port. If that works, the server is running; the problem then probably only affects the subdomain or SRV record. If it persists, contact support.
Will I get a notification when provisioning is complete?
Yes. You'll receive an email with the access details. A Discord notification is possible if you've enabled it in the settings beforehand.