ARK admin commands on a multiplayer server: Authenticate in-game with enablecheats <AdminPassword> and use the prefix admincheat for commands that change the world. RCON is suitable for maintenance; commands that need a crosshair target or your own character belong in the in-game console. Before delete commands, back up a separate, restorable copy of the world.
Requirements for Admin Commands
Before you use admin commands, you need access to the server configuration and a set ServerAdminPassword. On a rented ARK server, you typically manage these values in the panel under Configuration. At game-serverhosting the focus is on a paid multi-game setup with technical control, support and comprehensible operations, so that you can manage admin access, restarts and configuration changes cleanly.
This guide describes ARK: Survival Evolved (ASE); where ARK: Survival Ascended (ASA) differs – console key, player IDs, whitelist file, player limit – it is stated explicitly. For ARK: Survival Evolved you should plan enough resources. Choose a currently bookable ASE slot tier with the included resources. Map, mods, a grown save and dino density can create additional load; the booked slot limit is not a performance guarantee. For ASA, its own resource offering applies, not automatically the ASE slot model.

- Go to Rent an ARK Server
- Check the currently bookable slot/resource tier for your ARK edition, map and mods.
- The server installs itself fully automatically via SteamCMD
- Set your ServerAdminPassword in the server settings — you need it for
enablecheats
If you additionally need terminal basics for server operation, logs and file changes, the guide on important Linux game server commands helps. For admin workflows in other games you can find comparable overviews, such as the Rust Server Commands for Admins or the Valheim Server Commands.
Enabling the Admin Console
Here is how to open the admin console depending on platform and game version. In ARK: Survival Ascended you must first enable console access in the settings under Advanced:
| Platform | ARK: Survival Evolved | ARK: Survival Ascended |
|---|---|---|
| PC | Tab |
~ (tilde); a second press enlarges the console |
| Xbox | Pause menu, then LB + RB + X + Y simultaneously |
Open the pause menu, then the button shown at the bottom left (View) |
| PlayStation | L1 + R1 + Square + Triangle simultaneously |
Open the pause menu, then the button shown at the bottom left (left Options button) |
After opening the console, authenticate with:
enablecheats <YourAdminPassword>
Afterwards you can run admin commands. According to the ARK Official Community Wiki on Console Commands, on multiplayer servers cheat commands after enablecheats in particular require the prefix cheat or admincheat; in singleplayer this is different. For this guide, the safest choice on servers is admincheat whenever a command changes the game world, creatures, players or inventories.

Basic Admin Commands
You will need these commands often as a server admin. After each command, check directly in the game whether the effect took place before you stack further changes.
| Command | Description |
|---|---|
admincheat fly |
Enable flying |
admincheat walk |
Disable flying |
admincheat ghost |
Noclip (walk through walls) |
admincheat god |
Invulnerability |
admincheat infinitestats |
Health, stamina, oxygen, hunger and thirst permanently full |
admincheat saveworld |
Save the game world immediately |
admincheat settimeofday <HH:MM> |
Set the time of day (e.g. 12:00) |
admincheat slomo <value> |
Game speed (1 = normal, 0.5 = half) |
Use god, ghost and slomo sparingly on production servers. These commands are useful for support cases, build corrections or troubleshooting, but can distort the normal play experience.
Dino Commands
Spawning and managing dinos is one of the main reasons for admin commands in ARK:
# Spawn a dino (simple)
admincheat summon <DinoID>

# Spawn a dino with a level specification (blueprint path in quotes, then distance, Y offset, Z offset, level)
admincheat SpawnDino "<Blueprint-Path>" <Distance> <Y-Offset> <Z-Offset> <Level>
# Example: admincheat SpawnDino "Blueprint'/Game/PrimalEarth/Dinos/Rex/Rex_Character_BP.Rex_Character_BP'" 500 0 0 150

# Tame the targeted dino; check target and context on a test copy first
admincheat forcetame

# Spawn a tamed creature with a desired level (summon, by contrast, creates a WILD creature right at your position)
admincheat gmsummon "<Dino-ID>" <Level>

# Kill all wild dinos and let them respawn
admincheat destroywilddinos

# Color the targeted dino (region 0-5, color 0-255)
admincheat settargetdinocolor <Region> <Color>
Important Dino IDs (Spawn Commands)
| Dino | Spawn command |
|---|---|
| T-Rex | summon Rex_Character_BP_C |
| Giganotosaurus | summon Gigant_Character_BP_C |
| Wyvern (Fire) | summon Wyvern_Character_BP_Fire_C |
| Argentavis | summon Argent_Character_BP_C |
| Quetzal | summon Quetz_Character_BP_C |
| Mammoth | summon Mammoth_Character_BP_C |
| Ankylosaurus | summon Ankylo_Character_BP_C |
destroywilddinos is particularly invasive: all wild creatures are removed and then redistributed. Only run the command when you are fixing spawn problems or want to load new dino tables after configuration changes.
Player Management
As an admin you can moderate players, teleport them and step in when there are problems:
# Show player list (ASE: with SteamID, ASA: with EOS ID)
listplayers

# Take the target ID from the player list actually output or from the server management

# Open the graphical admin manager (player list, kick, ban, whitelist – handy on Xbox/PlayStation)
showmyadminmanager

# Kick a player (ID from listplayers)
kickplayer <ID_from_listplayers>

# Ban a player permanently
banplayer <ID_from_listplayers>

# Lift a ban
unbanplayer <ID_from_listplayers>

# Teleport a player to you
admincheat teleportplayernametome <PlayerName>

# Teleport yourself to a player (by name; alternatively teleporttoplayer <PlayerID>)
admincheat teleporttoplayername <PlayerName>

# Delete all entities of a class across the entire map (including tamed ones!)
admincheat destroyall <ClassName> 1
Note on destroyall: the command deletes all entities of the specified class on the entire map – creatures including tamed ones, structures or dropped items (example: admincheat destroyall Ankylo_Character_BP_C 1). It is not an inventory command. Only use it when you know the target class for certain and have planned a save or backup beforehand.
Server Management
These commands affect the server as a whole:
# Save the game world
saveworld

# Send a server message to all players
broadcast <Your message>

# Shut down the server immediately (saveworld first!)
admincheat DoExit

# Destroy ALL structures of ALL players across the entire map (no radius!)
admincheat destroystructures

# Start a weather/event (values depend on the map, e.g. makeitrain on The Island, start_superheat on Scorched Earth)
admincheat ce <Event>
Before DoExit, destroystructures or large world changes, you inform the players and run saveworld. Additionally copy the saved state as a backup outside the active save path before a destructive action; a later autosave can overwrite the previous state. This keeps the process transparent and players understand why the server briefly reacts or restarts.
GameUserSettings.ini — Important Settings
This file controls central server parameters. At GSH, offered panel startup values take precedence: in particular, set the admin password via the corresponding server settings field. The following INI excerpt shows manufacturer parameters for a self-managed configuration; password and player limit are taken over at startup in the managed setup:
[ServerSettings]
ServerAdminPassword=YourSecurePassword
DifficultyOffset=1.0
OverrideOfficialDifficulty=5.0
TamingSpeedMultiplier=5.0
XPMultiplier=2.0
HarvestAmountMultiplier=3.0
AllowFlyerCarryPvE=True
PreventDownloadSurvivors=False
PreventDownloadItems=False
RCONEnabled=True
RCONPort=27020

[/Script/Engine.GameSession]
MaxPlayers=20
DifficultyOffset=1.0 alone only yields wild levels up to 120; only OverrideOfficialDifficulty=5.0 brings level 150, as on official servers. Breeding multipliers do not belong in GameUserSettings.ini, but in Game.ini in the same folder:
[/script/shootergame.shootergamemode]
BabyMatureSpeedMultiplier=10.0
EggHatchSpeedMultiplier=10.0
MaxPlayers=20 is a manufacturer example, not an independent expansion of a GSH package. In ARK: Survival Evolved, the managed startup takes over the booked slots. In ARK: Survival Ascended, MaxPlayers from the INI is ignored; there the startup argument -WinLiveMaxPlayers=<number> sets the limit. For ASA, check the startup values and resources actually offered, without transferring the ASE slot model to it.
RCON Instead of the Console
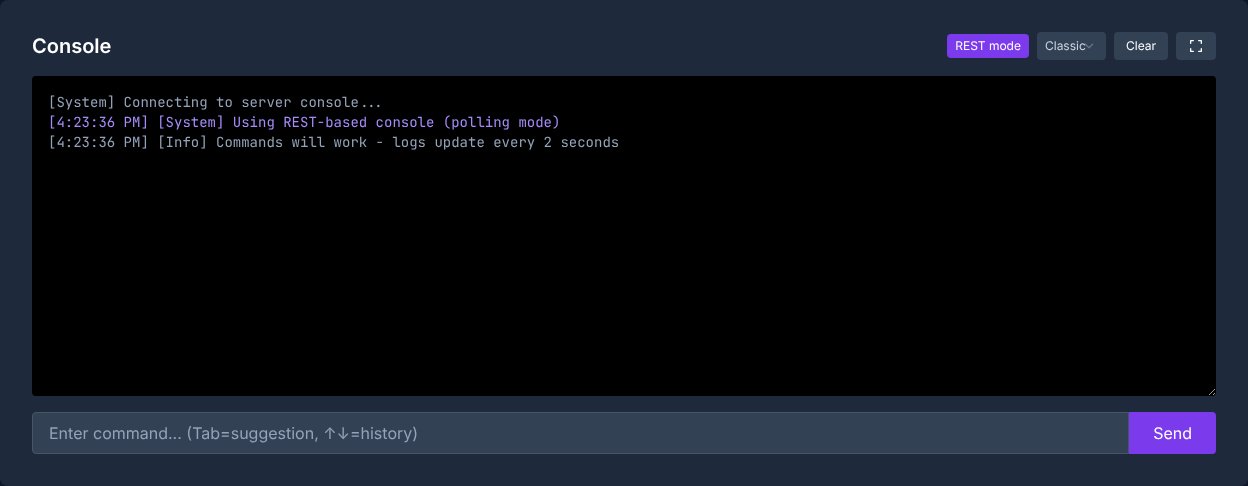
The game-serverhosting panel console uses the prepared internal RCON path of the ARK setup. You do not need to open an additional public TCP port for that. The example value RCONPort=27020 is a software default and not a guaranteed external hosting assignment; the effective startup values can override the INI value.
An external RCON client, on the other hand, needs an explicitly provided, secured assignment and the matching admin password. An enabled RCON option alone does not create this public connection. For maintenance, use the panel console first. Via the RCON command path, saveworld, broadcast, listplayers, kickplayer and DoExit are possible, among others. Back up the game state before shutting down. Commands that need a target in the crosshair or your own character (forcetame, fly, god, ghost) belong in the in-game console.
Change values in a controlled way: stop the server or announce the restart. Save released startup values such as the admin password in the panel; maintain the remaining multipliers in the appropriate INI. Restart and check the effect in the game. For the ASE player limit, the booked slots apply. The earlier note about a blanket SetHarvesting command is not reliable without the exact command form; for permanent server values, the configuration file is the comprehensible way.
Verifying the Result
After setup, first test a harmless command. Open the console, run enablecheats <YourAdminPassword> and then send broadcast Test. If the message appears, authentication works. After that you can test saveworld and check in the panel or log whether the save process completes without errors.
For dino or teleport commands, you should test in a safe area, not in the middle of an active base. For new admins, a separate password concept and a clear agreement on which commands are allowed during live operation are recommended.
Troubleshooting
If enablecheats does not work, first check upper/lower case, spaces and whether the password exactly matches the ServerAdminPassword value. At GSH, check the saved admin password in the panel and restart after changing it; a differing INI entry does not replace the startup value.
If a command seems to be ignored, add admincheat or cheat as a prefix on multiplayer servers. Some commands also only work on a target in the crosshair or only on certain maps.
If player commands fail, use listplayers and work with the correct ID instead of similarly spelled names – in ARK: Survival Evolved this is the SteamID, in ARK: Survival Ascended the EOS ID. For deletion actions: check target ID and edition, create an independent backup, execute and verify the effect. Only save the new result once the effect was intended.
FAQ
What is the difference between cheat and admincheat?
On multiplayer servers, many admin commands after enablecheats are executed with cheat or admincheat. In singleplayer the prefix is often not needed. For server operation, admincheat is the clear, easily recognizable form.
How do I set the admin password?
At GSH, you save a secure admin password in the released server settings field and restart the server. Then test enablecheats <AdminPassword> with a harmless action. The INI line ServerAdminPassword=YourPassword is the manufacturer's way for self-managed starts without an overriding startup value.
Why doesn't enablecheats work?
Usually the password isn't exactly right, the server wasn't restarted after the change, or you are using the wrong console. Also check whether there are accidental spaces before or after the password.
Can I pass admin rights on to other players?
Yes, but not via AllowPlayerToJoinNoCheck; that command only lets a player join past the player limit. For permanent admins, you enter the IDs line by line in a whitelist file under ShooterGame/Saved/: in ARK: Survival Evolved the SteamIDs in AllowedCheaterSteamIDs.txt, in ARK: Survival Ascended the 32-character EOS IDs in AllowedCheaterAccountIDs.txt. Listed players have cheat rights without enablecheats; whoami shows your own ID in the expanded console. A true join whitelist, on the other hand, runs via PlayersExclusiveJoinList.txt in the folder ShooterGame/Binaries/Win64/ (Linux: Linux/) plus the startup argument -exclusivejoin.
When should I use saveworld?
Use saveworld after important admin actions, before planned restarts and before risky changes. This reduces the risk that corrections you just made are lost through a crash or restart.