Complementary changes lighting, shadows, water, and atmosphere in Minecraft Java. Through the shader options, you can adapt the visuals to your taste and your computer. This guide explains important controls and a method you can use to compare their usefulness yourself. You need a suitable shader loader and a working version set made up of Minecraft, loader, graphics mods, and shader pack.
Reimagined or Unbound: What distinguishes the variants?
Complementary offers two starting styles. Reimagined is more strongly oriented toward Minecraft's characteristic look, while Unbound aims for a more realistic appearance. According to the developer, the variants differ in their presets; both can then be adjusted afterward. That means you do not have to change your entire installation just because you want a different water or cloud look. Complementary: variants and installation
Choose the starting style that is closer to the look you want. This avoids unnecessary changes and gives you a clear way back. A different style is not proof of better performance.
Before configuration: check installation and starting state
Start with a backed-up copy of your client instance. Note the Minecraft version, mod loader, shader loader, and the file name of the shader pack. Check the official download to see whether the version set is supported. A shader pack does not replace the shader loader.
The developer site offers an installer with Iris and a manual download. For an existing modpack instance, you should first check its requirements so that you do not add a second, conflicting graphics installation. The Iris project page explains the role of the shader loader and the limits of mod compatibility.
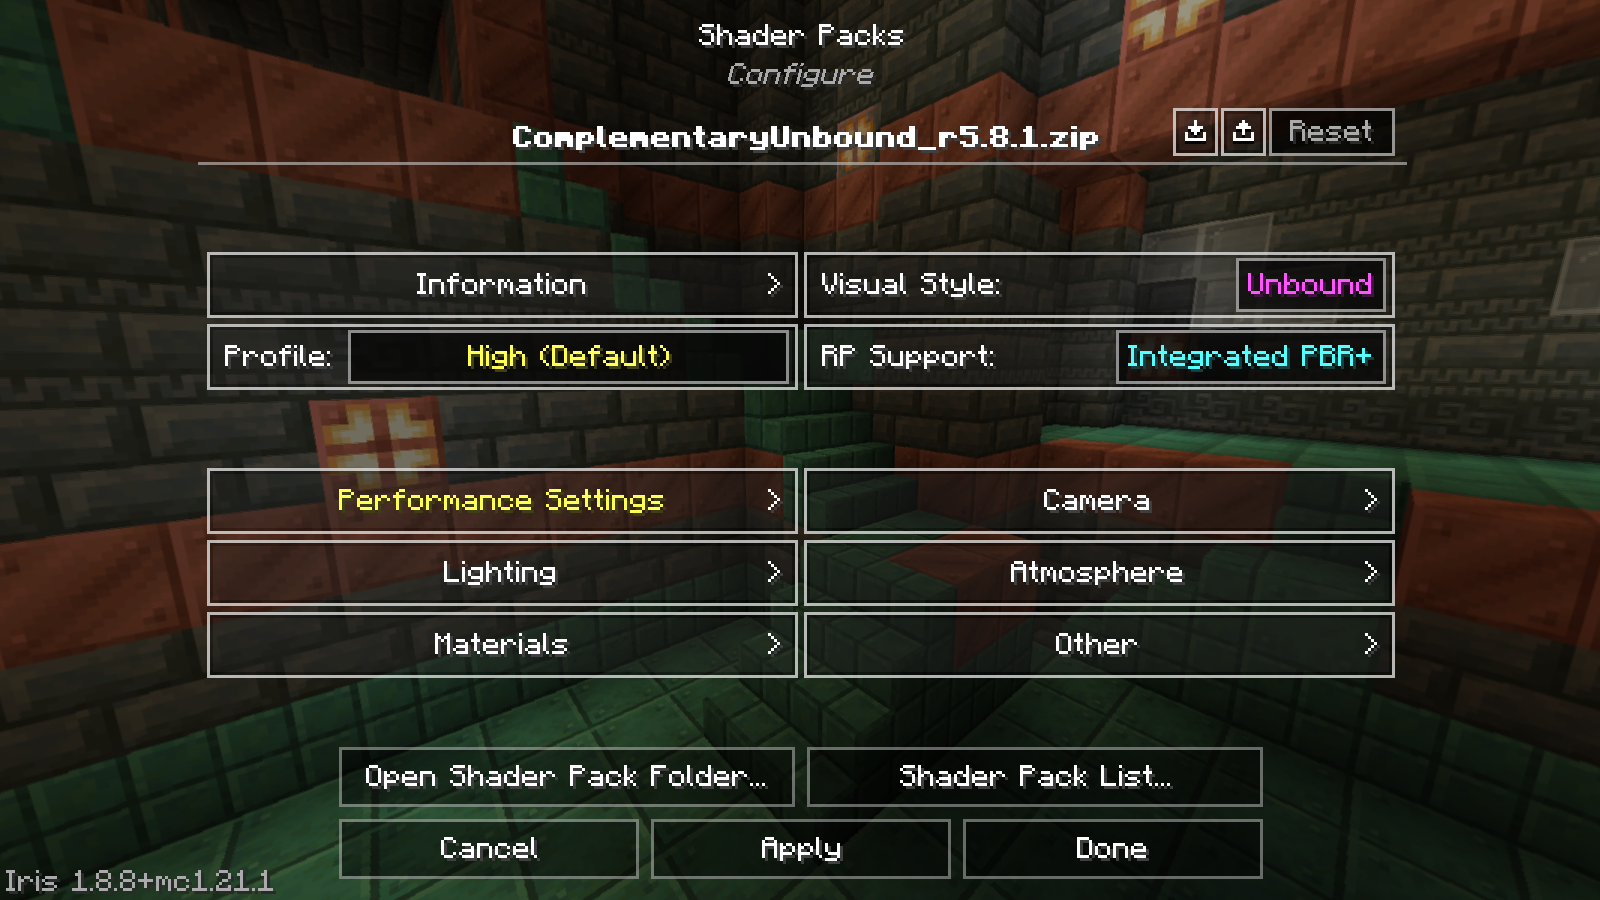
Open the shader options for the active pack. The exact menu path depends on the Minecraft and Iris version you are using. Take a photo of or write down your starting profile. If you change individual values, a full reset of the profile is often clearer later than guessing several original settings.
View original screenshot (1600 × 900)
What the most important settings do
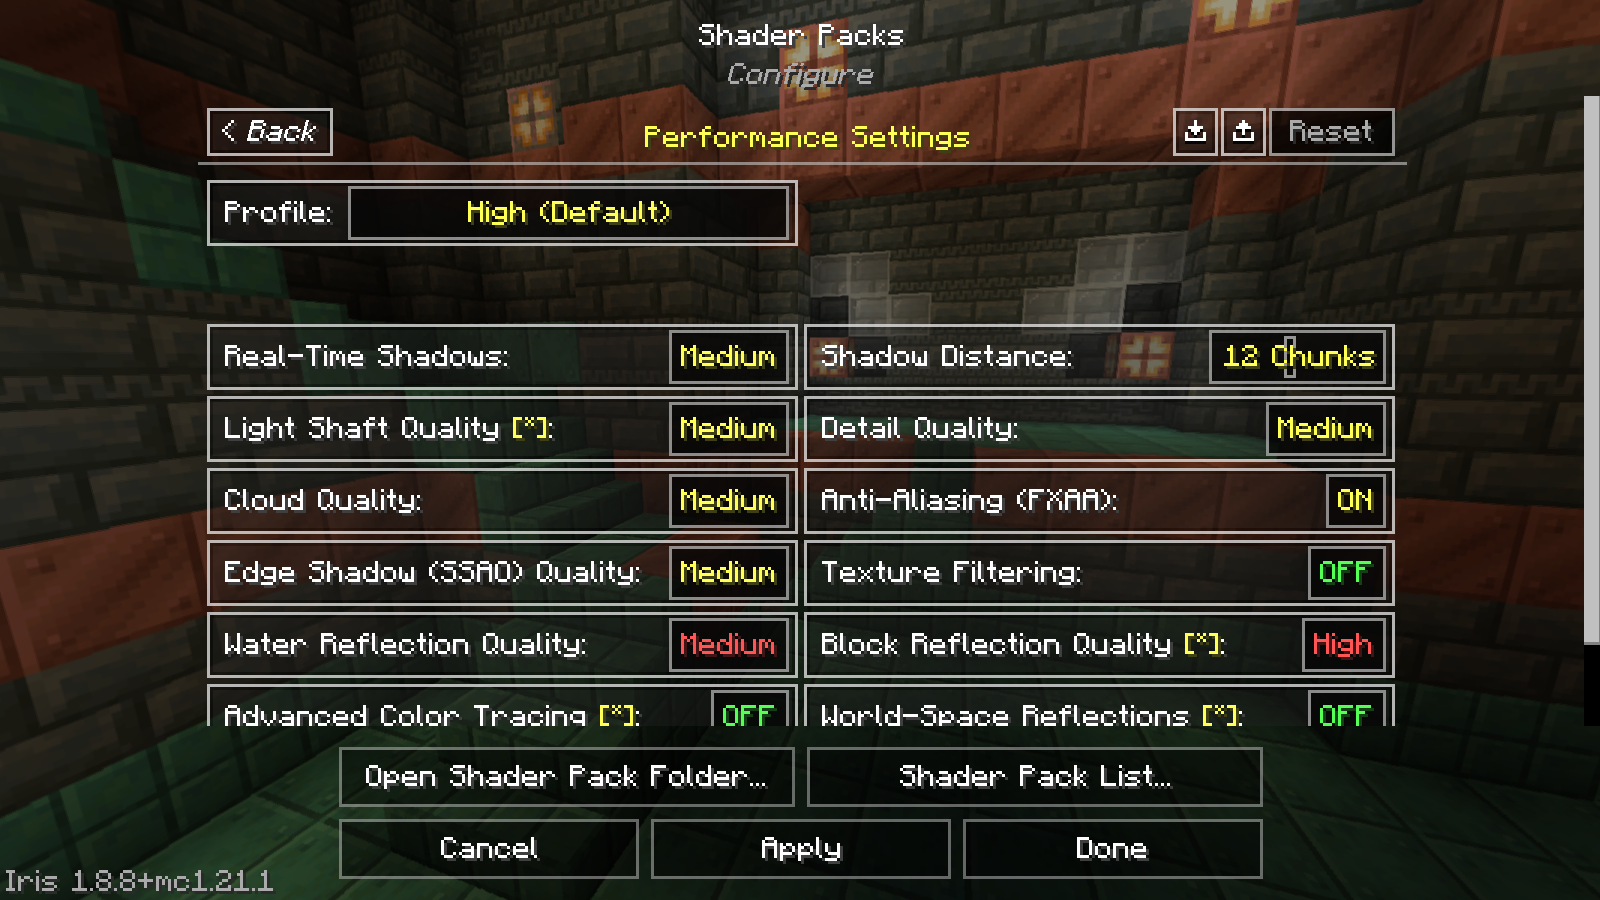
The technical labels help you find them again. All of the following keys and English option names were additionally checked directly in the pack Complementary Unbound r5.8.1 on 10 September 2026. Other pack versions may offer different labels and values.
| Option | Effect | What to watch for when comparing |
|---|---|---|
Real-Time Shadows (SHADOW_QUALITY) |
Quality of shadow calculation | Shadow noise and edges on buildings |
Shadow Distance (shadowDistance) |
Range of dynamic shadows | Transitions when looking into the distance |
Water style (WATER_STYLE_DEFINE) |
Basic water appearance | Readability of shoreline and underwater areas |
Water reflections (WATER_REFLECT_QUALITY) |
Quality of reflections | Visual calm on larger water surfaces |
Cloud quality (CLOUD_QUALITY) |
Quality level of cloud rendering | Contours and visual calm in open terrain |
Bloom (BLOOM_ENABLED, BLOOM_STRENGTH) |
Glow around bright image areas | Visibility of fine details next to light sources |
Motion Blur (MOTION_BLUR_EFFECT) |
Motion blur | Readability while turning and moving quickly |
General Brightness (TM_EXPOSURE) |
Overall image brightness | Recognizability of bright and dark areas |
The option definitions and related explanations can be viewed in the official repository. This list is not an instruction to edit the shader files directly: use the options provided in the game.
View original screenshot (1600 × 900)
Consider shadow quality and shadow distance separately
A more distant shadow edge and an unstable edge directly in front of you are different observations. First check which issue is actually bothering you. A house edge or fence works well for the near range; a longer road or open field works for distance.
Change only one of the two options and compare the same view. If you cannot see a relevant difference, you do not need to keep the higher setting just because of its name. If a lower level creates a distracting artifact, first restore the starting value. This keeps it clear which change was involved.
Water, clouds, and readability in everyday play
A screenshot on a sunny beach does not answer how comfortable your shader feels in a cave or in the rain. So choose several everyday situations: your base, a forest path, a shoreline, and a darker interior.
For water, check whether you can still clearly recognize the ground and the shoreline. For clouds, pay attention to the image during normal movement. Bright effects should not hide important items and contours. If motion blur makes aiming or building harder, compare the same path with the effect turned off.
Some of these decisions are a matter of taste. So document separately whether you like the image better, whether controls feel more comfortable, or whether you actually measured a performance change. A prettier scene and a faster scene are two different results.
Find a suitable profile in six steps
- Record a reference without shaders: Look at a familiar scene and note whether stutters already occur without shaders.
- Enable the shader starting profile: Compare the same scene. Wait until the image is displayed stably again after switching.
- Choose a lower quality profile if needed: Check whether the desired visual stability is achieved. Profile names alone do not guarantee a specific frame rate.
- Adjust one visible effect: Choose shadow distance or bloom, for example. Change only that area at a time.
- Check several everyday scenes: Use the same resolution and similar conditions. Also check water, interiors, and normal movement.
- Save your selection: Record the pack version, profile, and changed values. Keep the previous state for a later comparison.
If you compare FPS or frame times, use repeated sequences and note the hardware as well as the measurement method. This guide does not name measured FPS gains and does not give blanket “Ultra” recommendations.
When Distant Horizons is added
Compatibility has to fit DH, Iris, and the specific shader pack together. Iris describes a special integration of distant geometry. So do not treat a simple Minecraft/loader match as complete proof. Iris: Distant Horizons integration
First test the normal game image, then DH without shaders, and finally the combination. If terrain only disappears in the last step, you have narrowed down the affected area. Restore the shader starting profile before making further changes. Several fog, shadow, and LOD values changed at the same time make diagnosis harder.
Frequently asked questions
Does the shader need to be on the server?
These shader settings affect the rendering on your client. Do not change the Dedicated Server to enable Complementary there. For gameplay mods needed by everyone, use the separate alignment from Setting up mods and modpacks.
Why does the same setting cost my friend a different amount of performance?
Compare hardware, resolution, world, background programs, and the complete version set. Different FPS limits can also distort a comparison. Do not copy only the name of the shader profile.
Can I fix server lag with the shader?
For delayed shared actions, you need a server lag diagnosis. For the shared world, you can choose a suitable Minecraft server; each player still configures their personal shader quality locally.
Related guides
- Minecraft Graphics Settings Explained: View Distance, Simulation, and FPS
- Configure Distant Horizons: view distance, LODs, fog, and performance
This guide in other languages
Deutsch · العربية · বাংলা · Español · Français · हिन्दी · Bahasa Indonesia · Italiano · 日本語 · 한국어 · Nederlands · Polski · Português · Русский · Türkçe · اردو · 简体中文